Mandalorian Door, Panel, and Wall

INTRO
I love toy photography and fortunately I also have a passion for building. Creating things by hands has always been something that I’ve been drawn to. Growing up I remember putting together countless model cars and airplanes and making my own costumes and props. Today really isn’t much different!
Lately I’ve shifted my focus to building props and smaller dioramas to use for my photography. I’ve been fortunate to collaborate with the talented Figure Works Co. on several projects, and this Mandalorian doorway he modeled and printed, served as the inspiration fo my wall and control panel build. I chose to keep the wall design relatively simple to allow for flexibility when shooting. To elevate its simplicity, I decided to scratch build a control panel with working lights to act as a nice focal point. Following is a breakdown of the build divided into 3 parts - the door, control panel, and wall.
DOOR
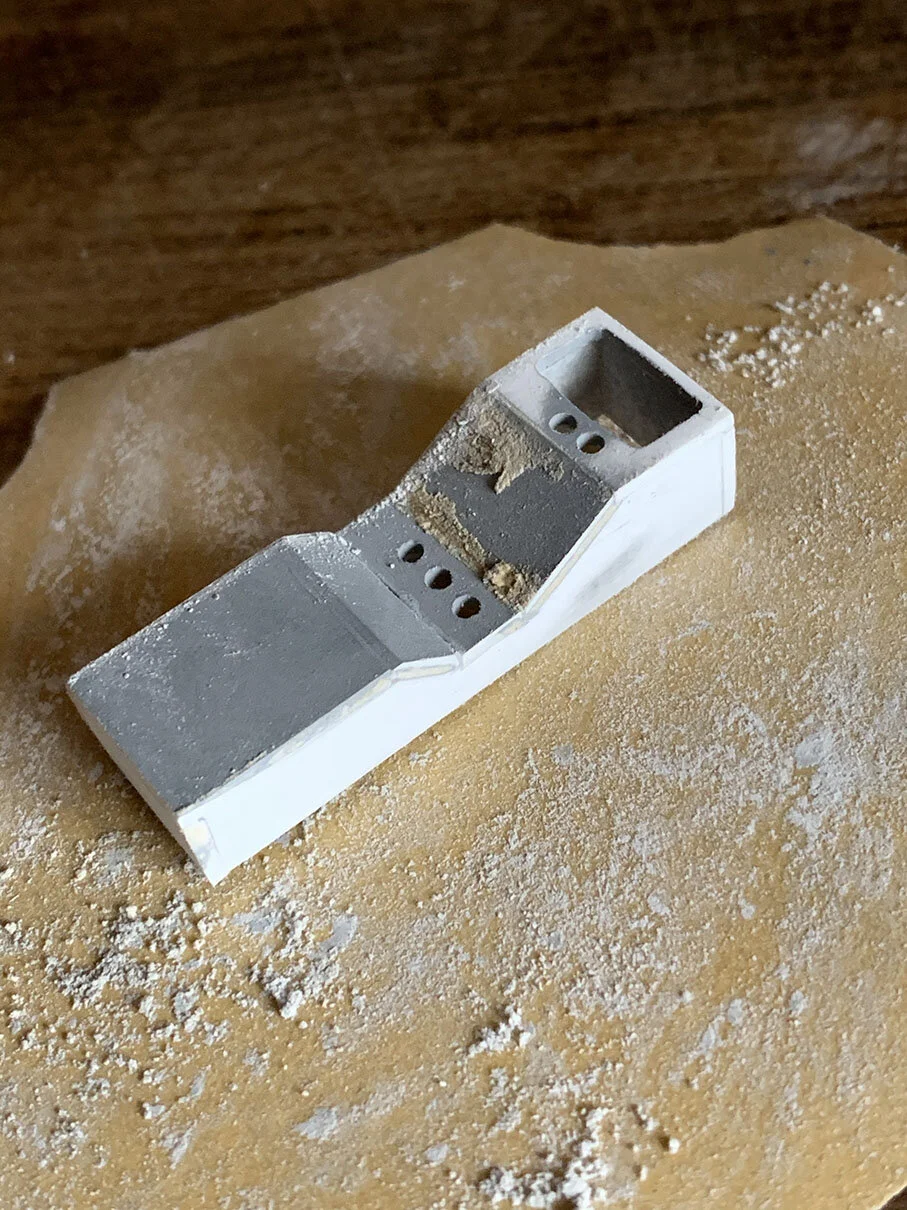
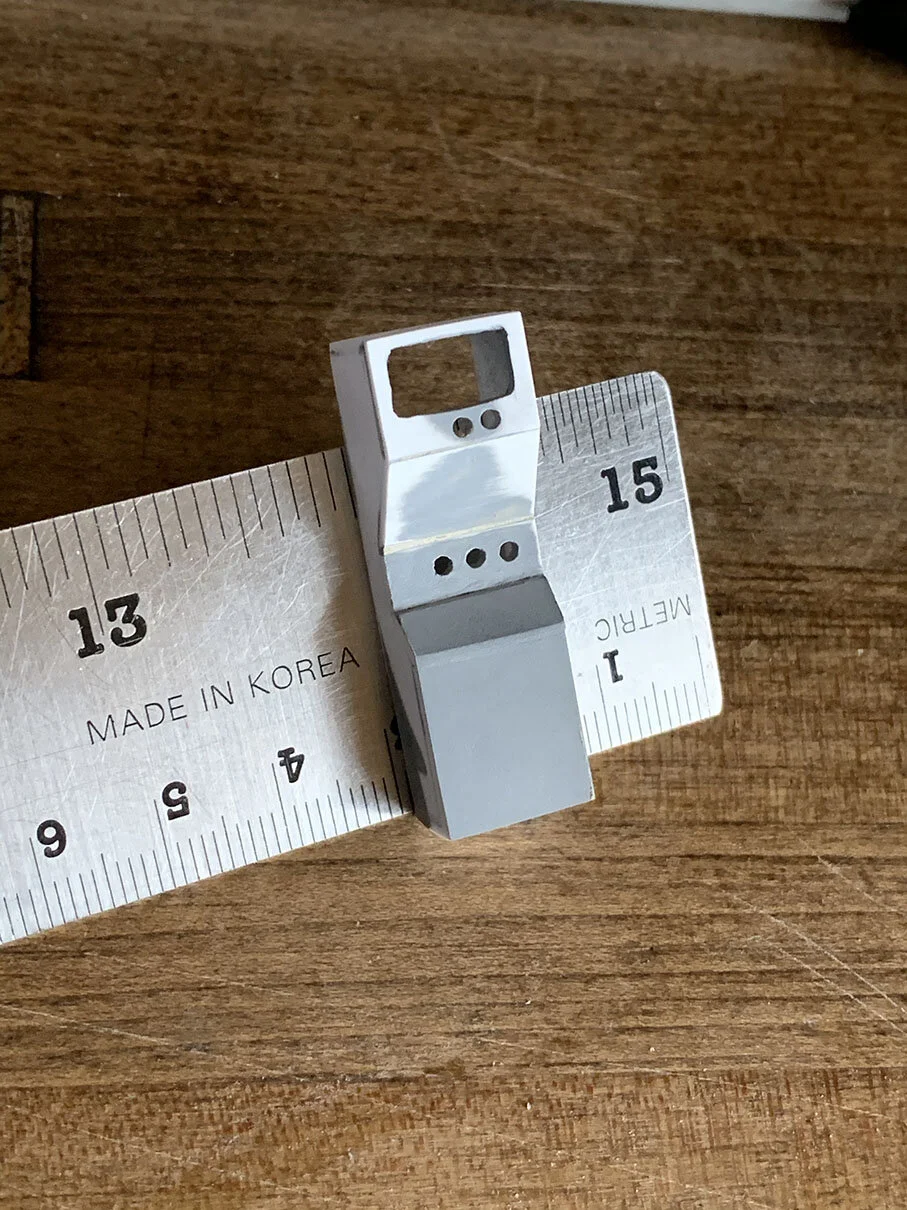
As I mentioned, this Mandalorian-inspired door was designed, modeled, and 3d printed by Figure Works Co. In the 3d renders provided you can see how the pieces were designed to allow for the sliding function. As a side note, this was the initial test design for the doorway. Since, there have been updated iterations with even better functionality and features which include a spring and locking mechanism.


PAINTING THE DOOR
When it comes to working with 3d prints, the first step is to do some simple clean up and preparation to the print. This model was in great condition to begin with, but I did end up using an X-acto knife to clean up a couple of stray print threads. Other than that, it was ready for the first coat of 2-in-1 filler primer. After the first liberal coating, I allowed it to dry and then went over it with an initial sanding with 400 grit sand paper to address any problem areas. I repeated the process at least one more time to prepare the surface as best I could.


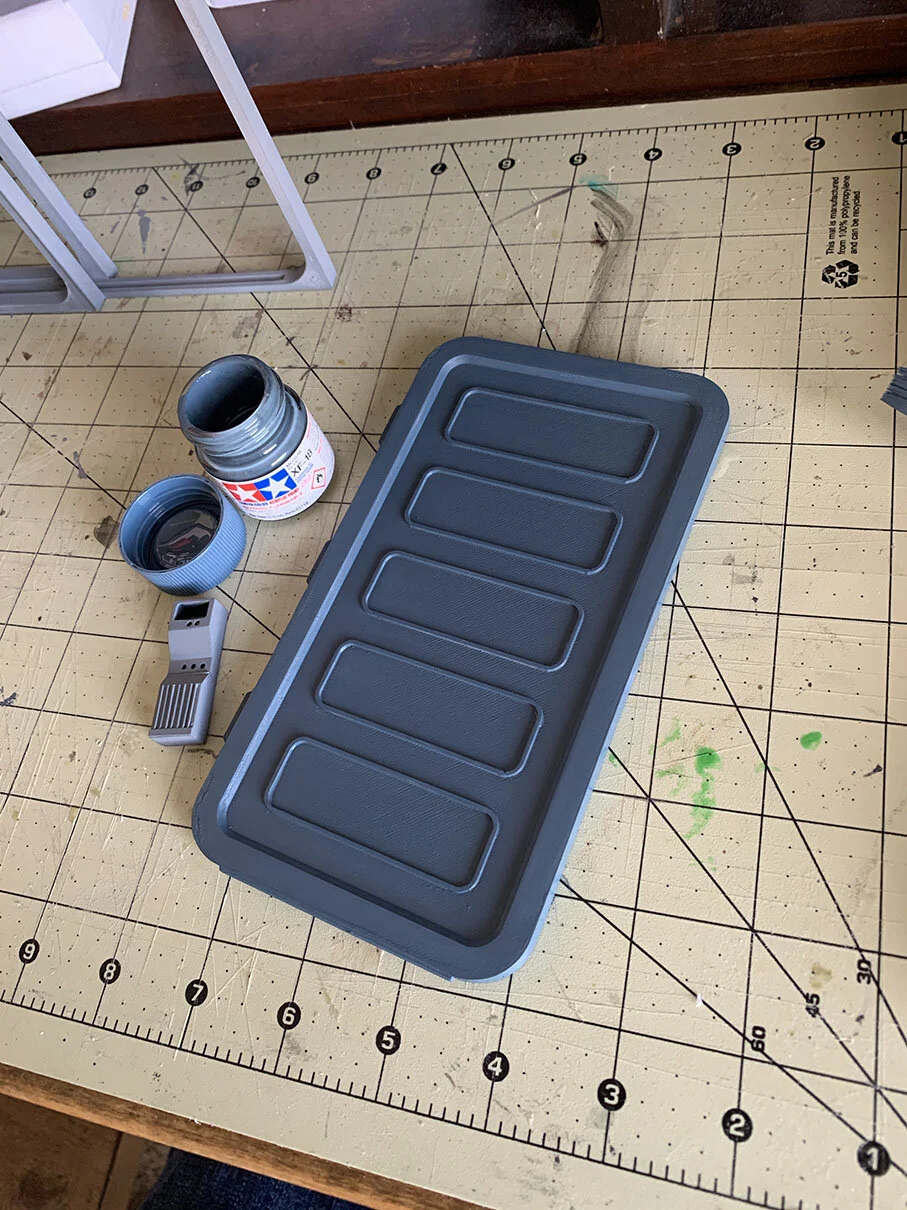


The next step was to add the base color to both the door and frame. Upon researching screenshots from The Mandalorian Chapter 3 of Season 01, I found a color that seemed to more or less match. I went with Tamaiya XF-18 Medium Blue. Now if I had an airbrush, I would have used it to apply, however knowing that Tamiya goes on rather smooth, a brush worked just fine. To help with any streaking you could dilute it slightly with their X-20A thinner, but I didn’t have an issue in this instance.
DISTRESS & WEATHERING
After applying a couple of coats of the blue, I allowed it to dry for about 30 minutes. With this door being utilitarian in form and function, I imagine it having a lot of scratches and dings so I ended up using an X-acto to, well, add some of my own scratches and dings.
To enhance the relief on the door, I created a simple black wash using Tamiya XF-69 Nato Black by adding a small amount of thinner to give it a runny consistency between water and milk. I then used a brush to apply the wash in the corners and crevices, and then wiping the excess away after letting it sit for 10-20 seconds. The black wash helps to add contrast, while adding the illusion of grime and wear, and subsequently knocking back the saturation of the blue.


Once the black wash is applied, I moved on to adding the details. When weathering, think about how the object ages over time and where the most distressed areas would be. I started with the white drips, which I assume are calcium deposits from hard water or something similar. Since they start at the top of the door and work downwards, my strokes followed that direction. In the areas with relief on the door, I intentionally left more paint to mimic light pooling.
Following comes the faux rust application using a variety of browns and orange acrylics. I start with the darker brown and apply it in the crevices and corners where water would collect and dry, leaving the rust. For this step, I use a dry brush technique and apply in more of a stippling pattern. Once I have the color on the brush, I wipe away most of it onto a paper towel to remove a majority of the moisture, while leaving enough on the brush to still apply to the surface of the model. Once the rust is blocked, I go over some of the same areas with a brighter orange or brown to add the highlights, mimicking the more oxidized areas of rusting. Apply until you’re happy with the results.
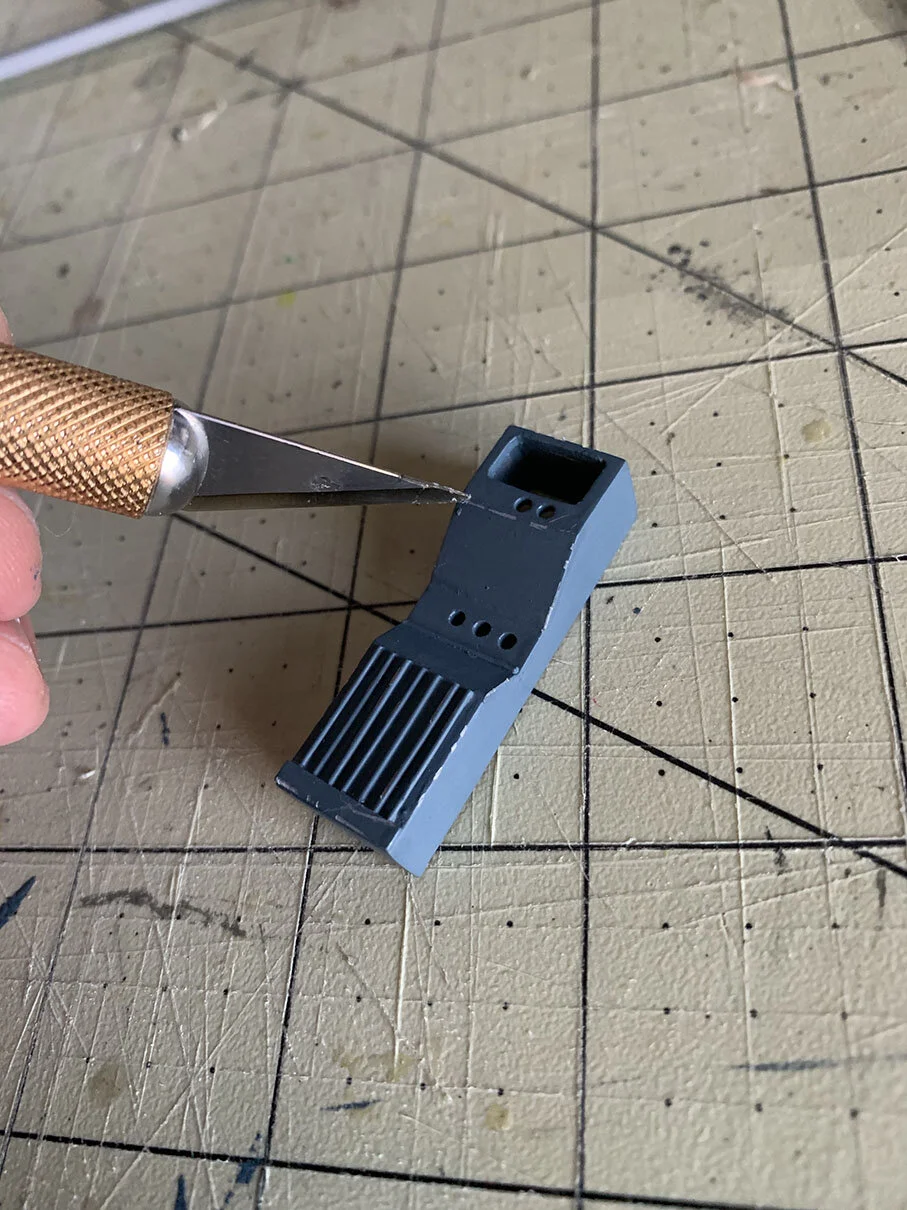
CONTROL PANEL

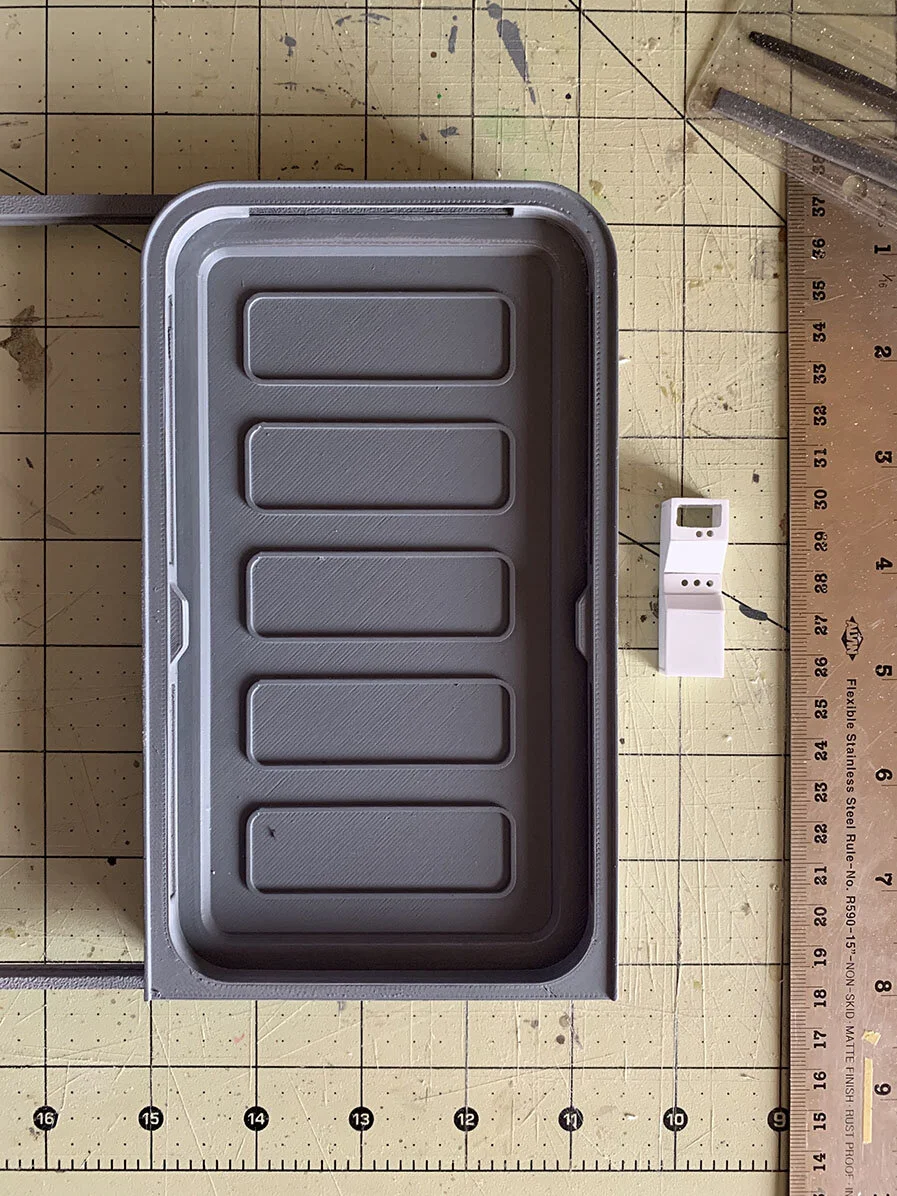


When I received the door from FigureWorks and I was considering the design for the wall, I realized I wasn’t going to be happy with it unless I had a control panel to go along with it. I initially thought that I could model the panel and try to print it, however I realized that was way more effort than necessary. With it being a relatively small and simple shape, I challenged myself to construct it myself - I’m glad I did!
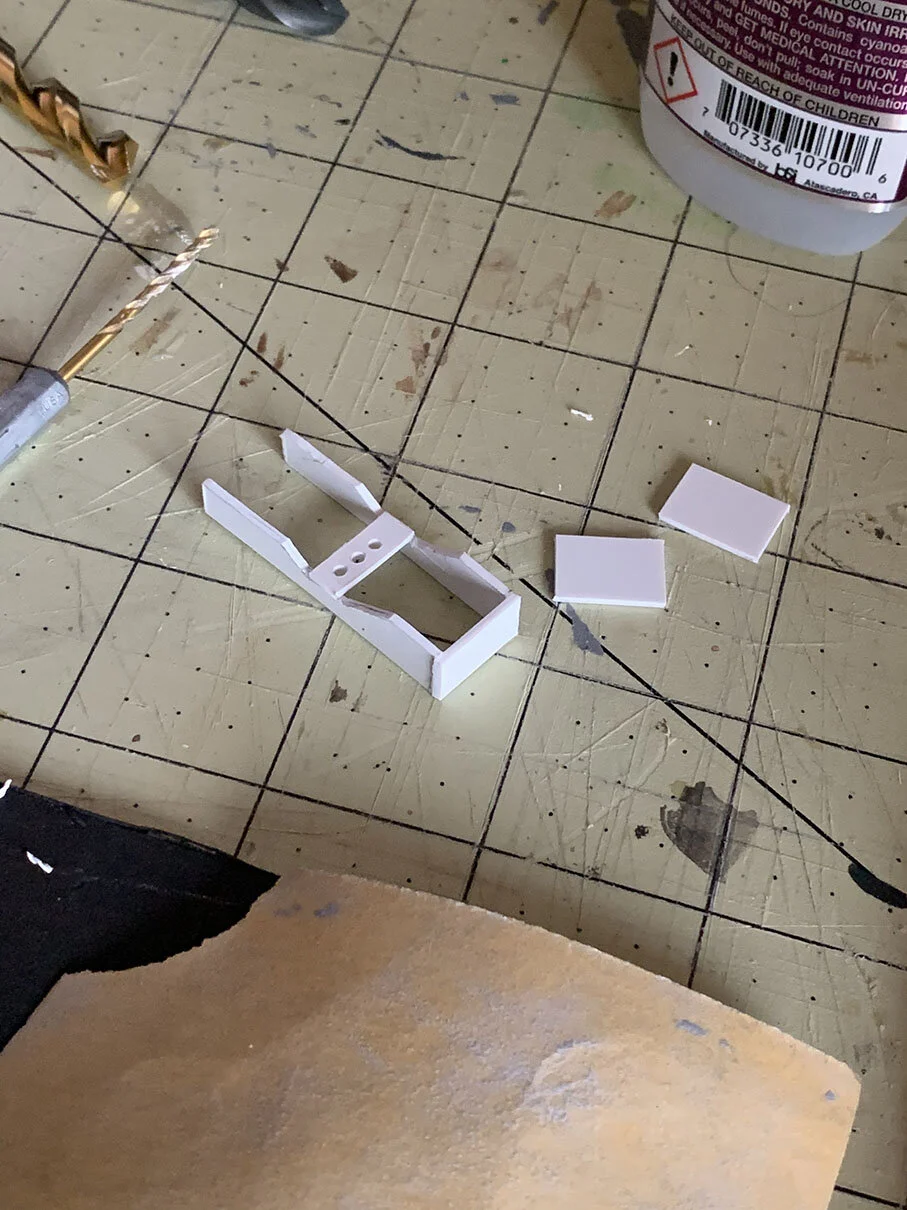
I had some scrap pieces of hobby plastic sheets, known as plasticard or styrene, that I used to build the panel. Like many things I create, I trust my eye more so than precise measurements. This case was no exception.
Starting with the side profile shape helped to determine the shapes required for the top, front and bottom faces. After having the basic perimeter framed, I then cut the appropriate sized rectangles to fit. The topmost front-facing surface required cutting out a rectangular window with an X-acto. A small round needle file was used to round the inside corners of the window, which helped hide over cuts and add a nice finish.
For the holes, I took a very small drill bit and carefully twisted it into the plastic to get nice clean holes. Again, they were eyeballed vs. measured out, which worked out in the end.
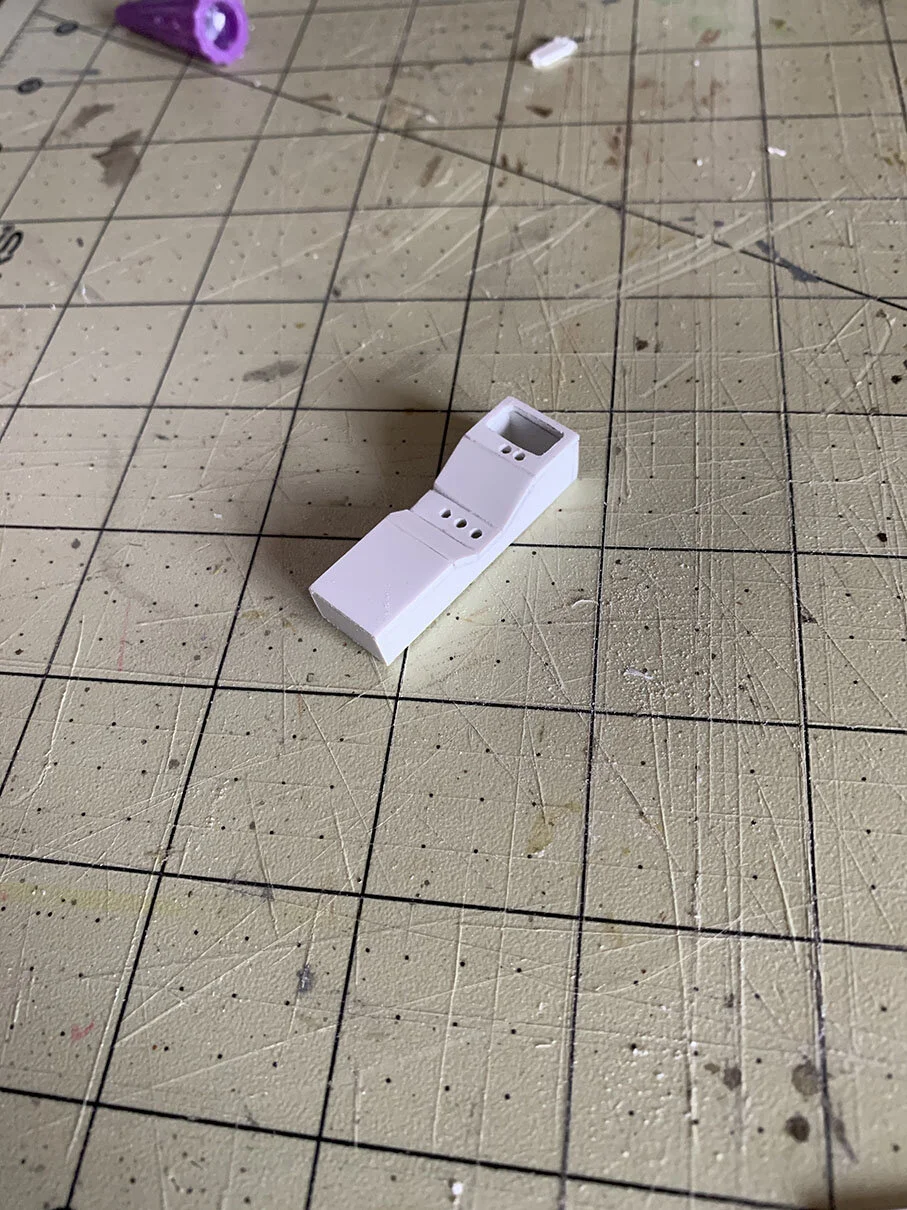
After it was constructed, a layer of primer filler was applied and then sanded to help clean up some edges and surfaces. A few visible seams were filled with wood filler, before another pass of primer and sanding was done to complete it.
Finally before paint, I decided to add a few more raised details along the bottom portion of the panel using prefabricated styrene strips. I know if I tried to cut them myself, they wouldn’t have been as uniform, so it was well worth the money.
PAINTING & LIGHTING


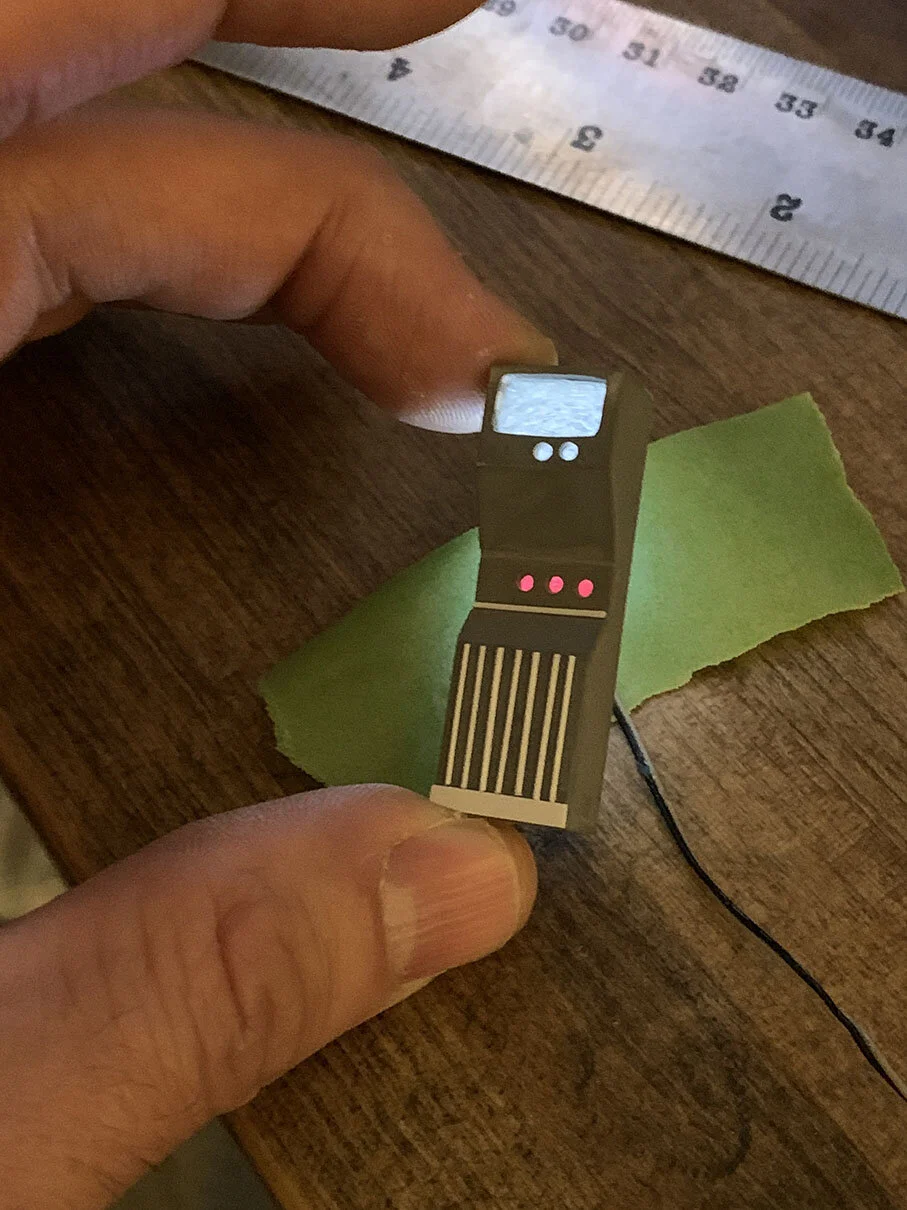

With the control panel constructed the next stage was adding paint. The same Tamiya XF-18 Medium Blue was used to match the door and applied in much the same way. Because I planned to backlight the panel, I sprayed a couple of coats of black on the interior of the panel to help reduce the chance of light leak. On the frontside, I painted black around the holes with black to provide a little more screen accurate detailing.
After much consideration and research, I decided on using the Just Plug LED lighting system. Could I have learned how to create my own lights and save some money? Sure, I honestly just wanted something that was going to get the results I wanted as quick as possible. The name of the lighting system says it all - just plug in and play!
The size of the LED lights work perfectly in the 1:12 scale. For the control panel, I strategically placed one Cool White LED stick-on light so it could evenly illuminate the holes. For the areas where I wanted the white light to show through, I cut a couple of small pieces of plastic from an isopropyl alcohol bottle. It works extremely well as the the plastic is opaque and helps to diffuse the light. I had an extra sheet of red transparency film that was used for the bottom three holes. To adhere the plastic and film, I gave them a small dab of cyanoacrylate glue, also known as CA glue.
Before moving on, I tested the light to see how everything looked once fully illuminated. The results were exactly what I had hoped. One additional benefit to the Just Plug system is that the lights are dimmable. That may not seem like a big deal, but for shooting, having the ability to change the intensity of the light is fantastic. I always like having the flexibility to balance out in-scene lighting to avoid over exposures.
WALL
Construction
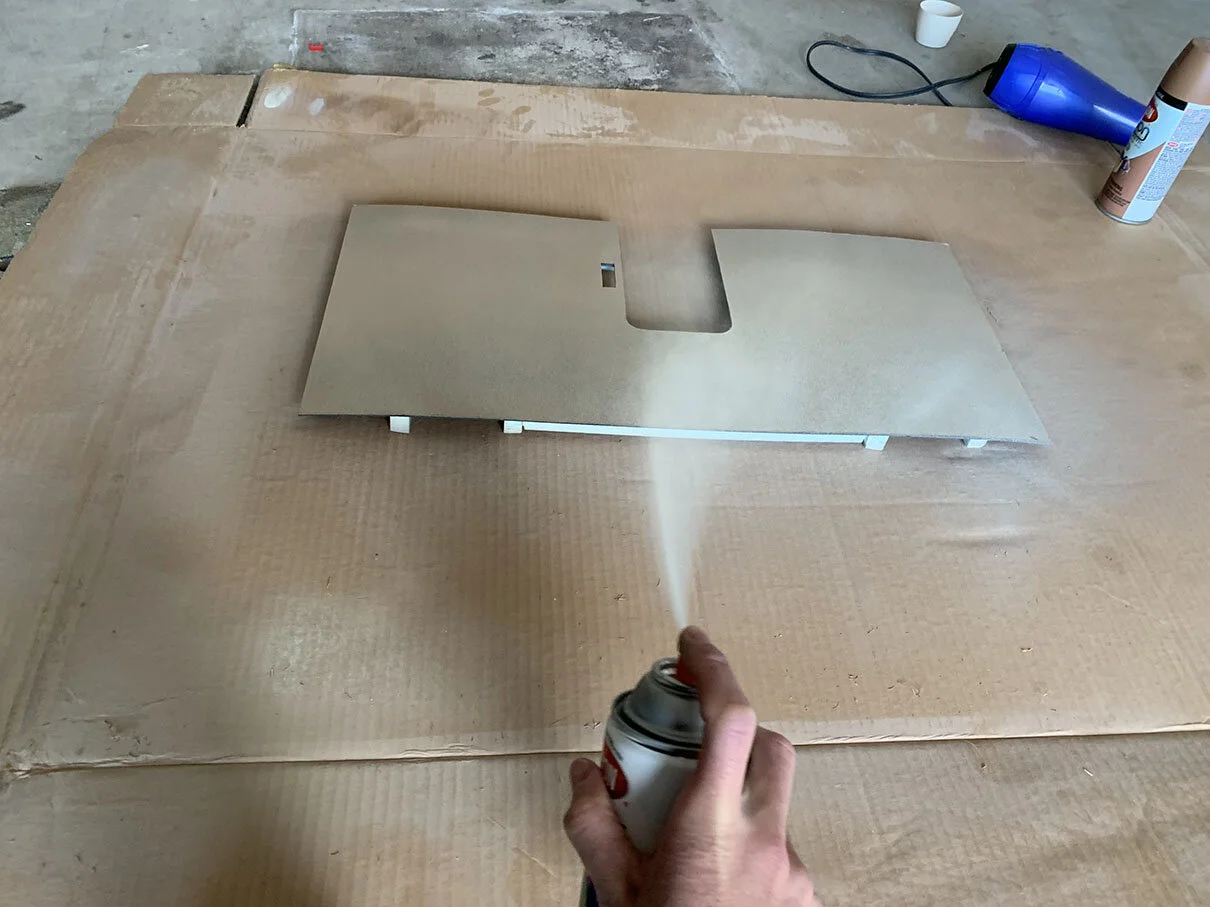
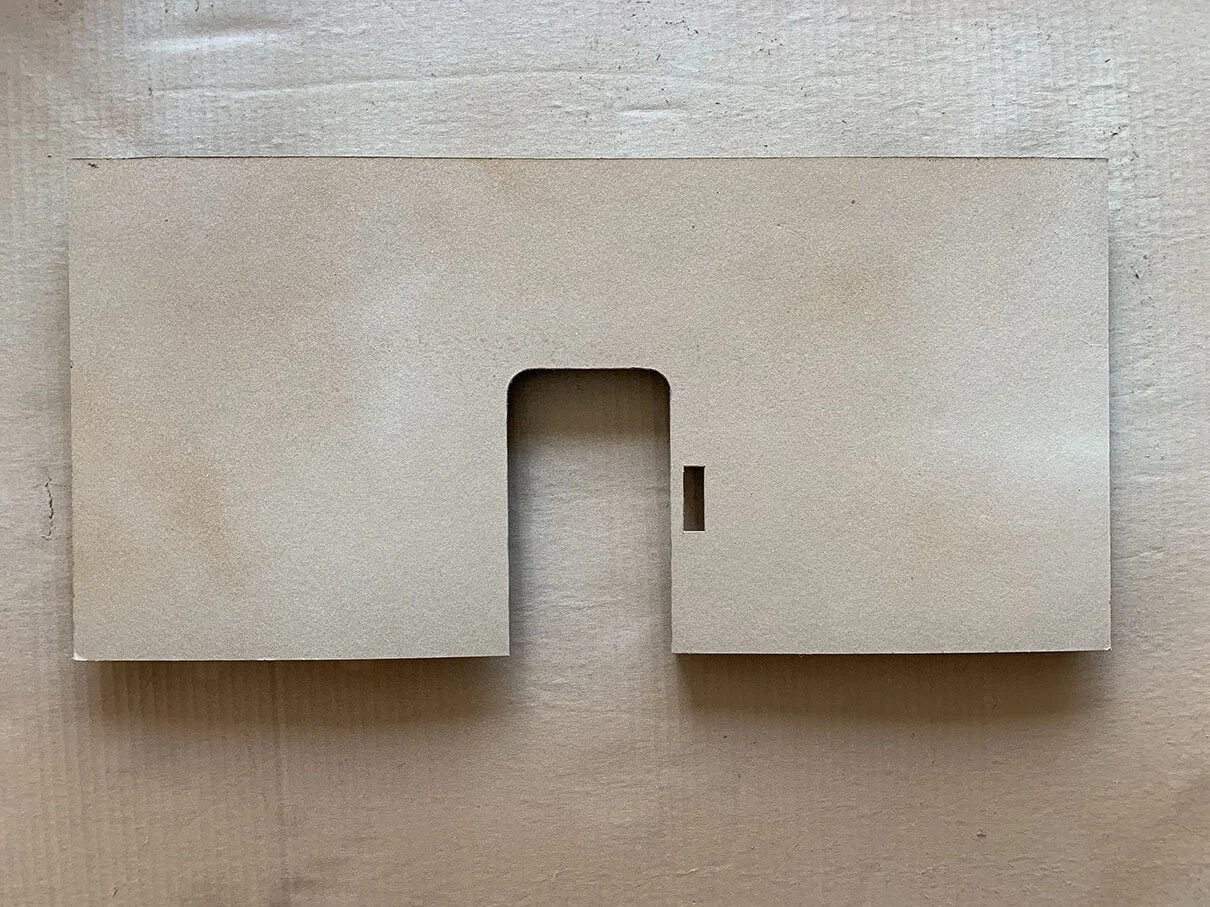
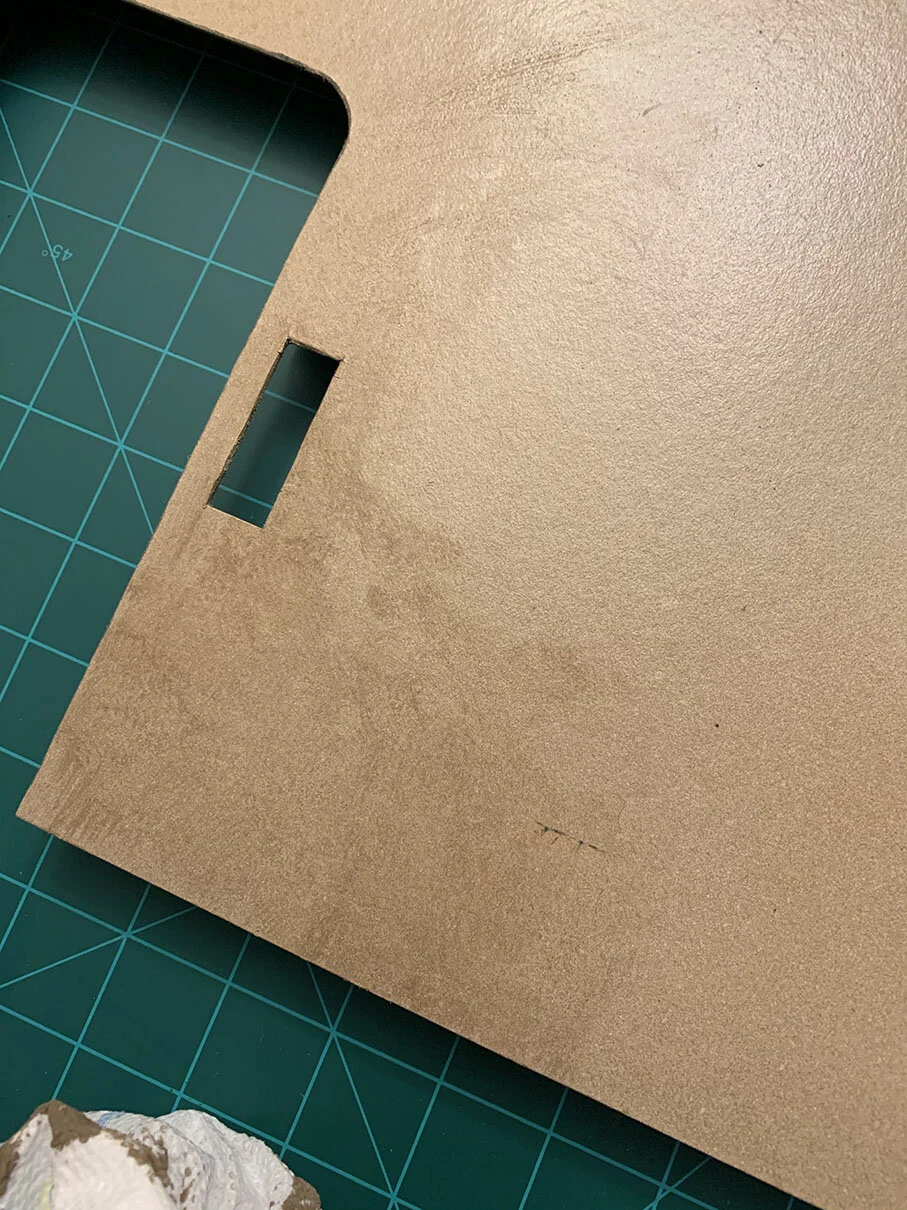
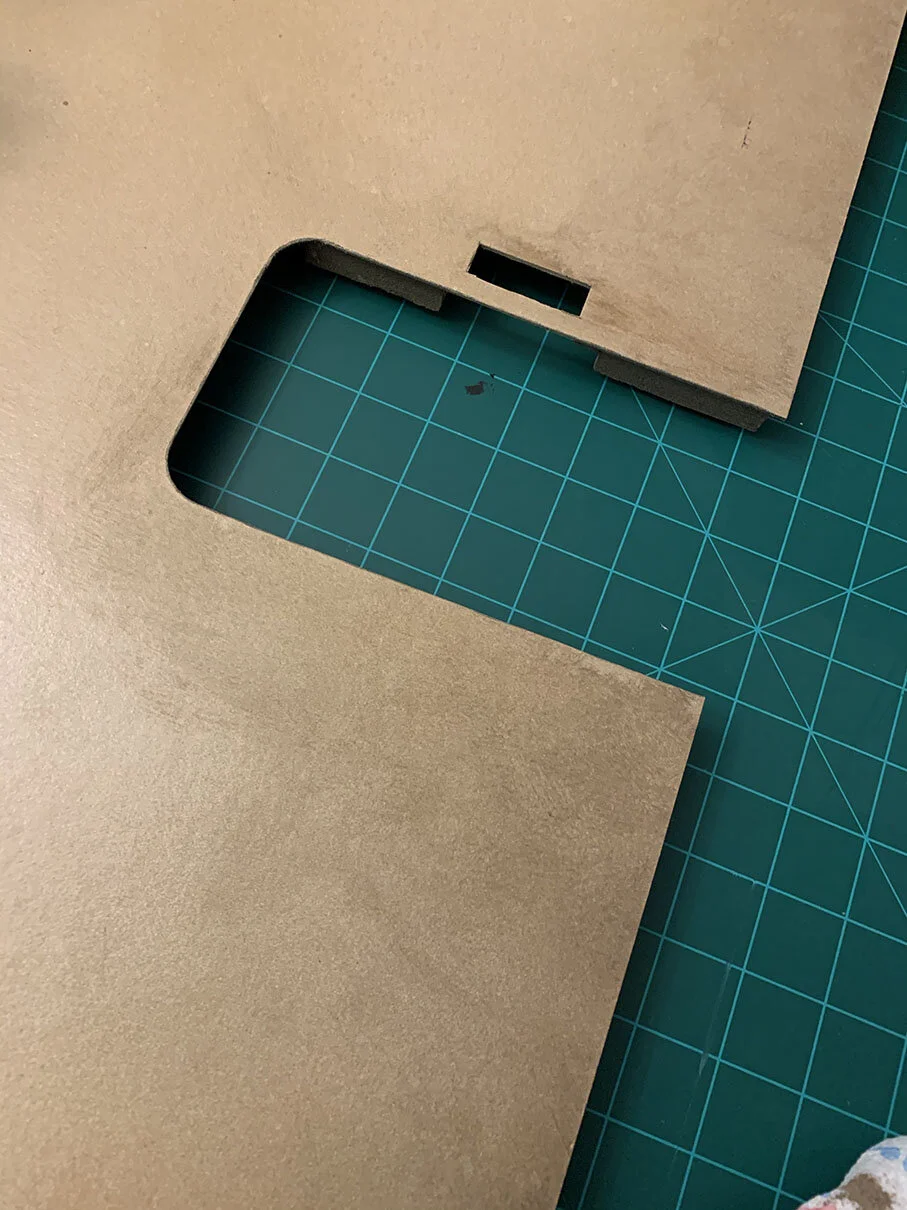
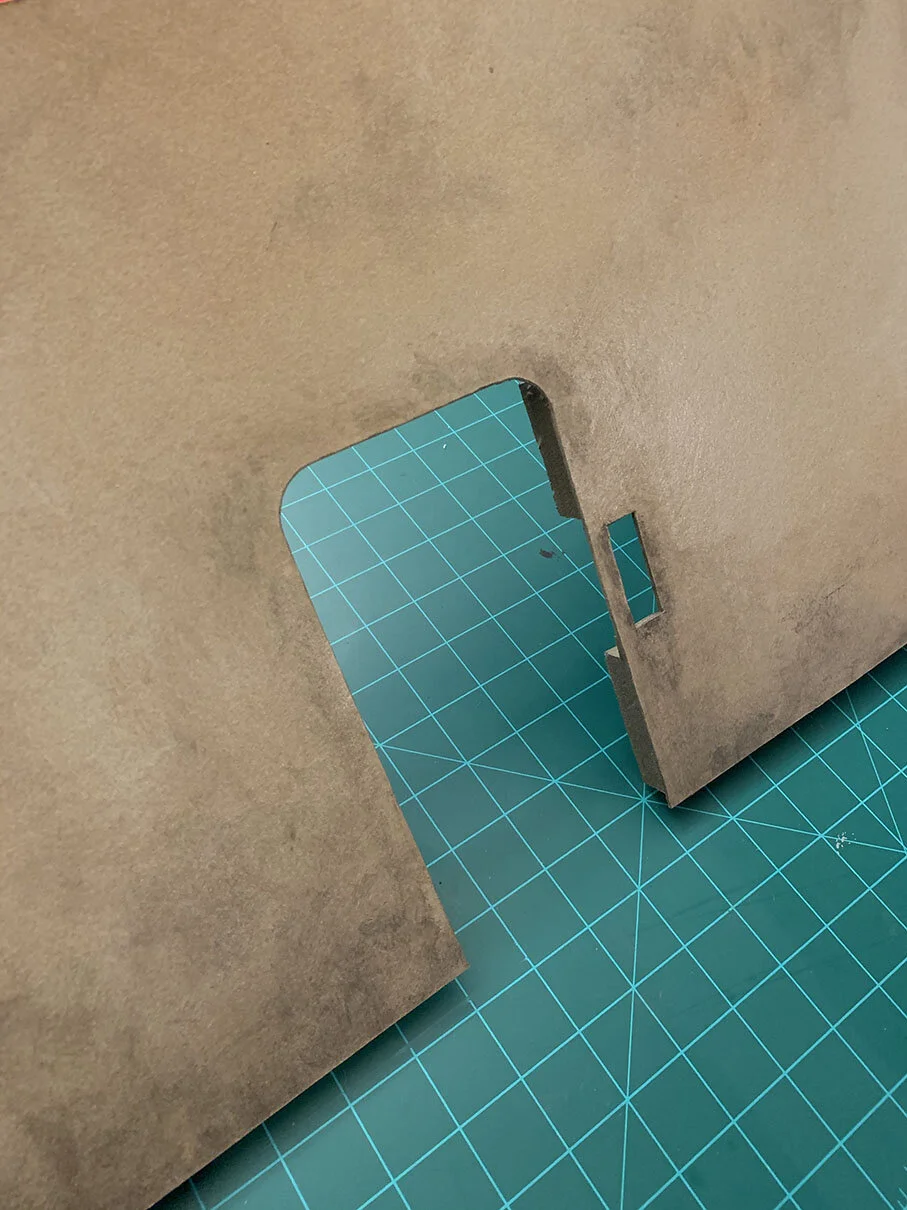
With the Doorway and Control Panel complete, the final step was to build the wall. There are various ways I could have gone about building a simple wall like the one I ended up with, however this seemed like the best solution at the time. My preference was to be able to have access to the inner workings so I could easily run the light wiring and remove the door if needed. The main wall surface is standard black mat board, which needed to be reinforced with some foam structure along the backside to prevent warping. It mostly works, but if I created it again, I would try to find a more rigid material.


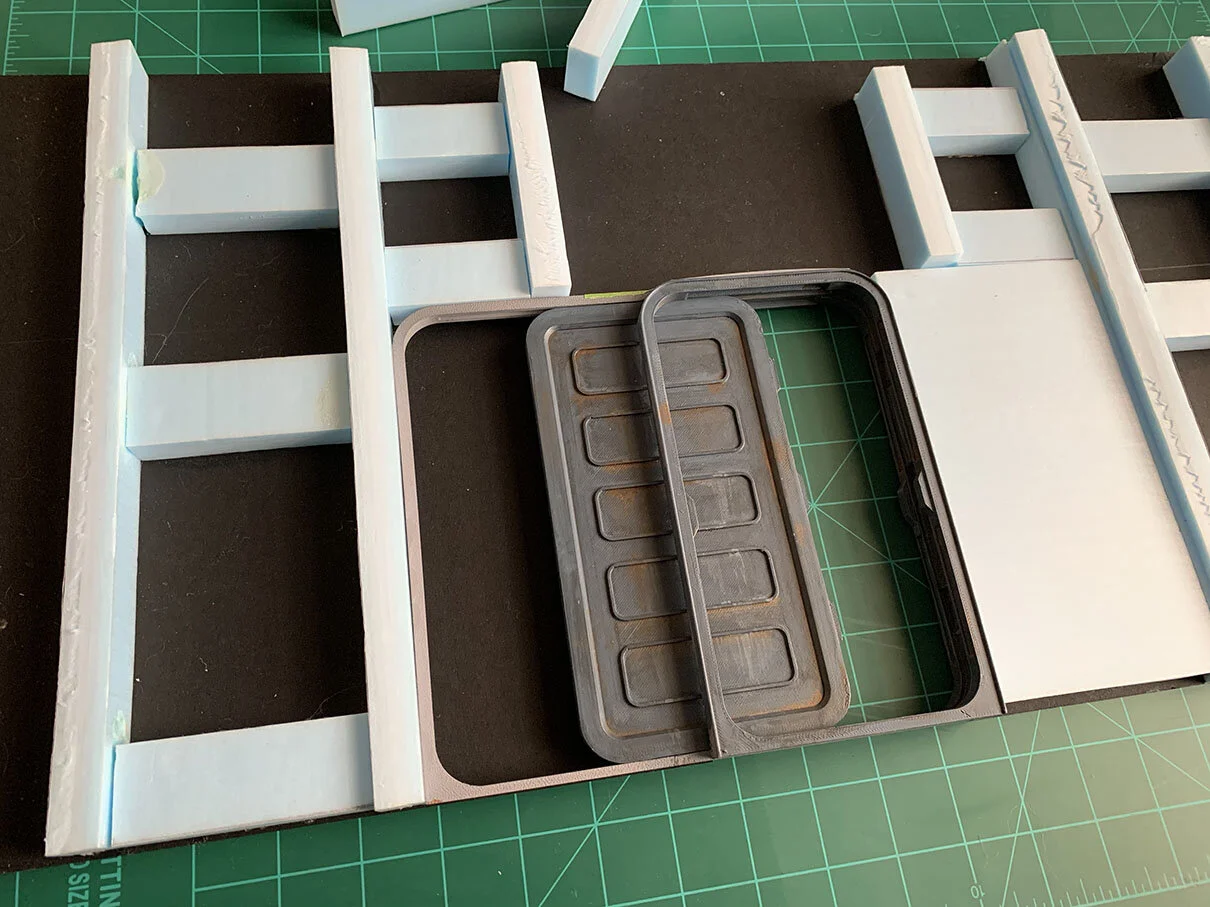
As much as I would like to say that everything was meticulously planned out for the majority of the wall build, it honestly wasn't. I ended up tracing both the door frame as well as the control panel, cutting along the inside of the line to create the holes. Foam strips were cut and placed on the backside to provide a bit more support. After dry fitting the LED light diode, I strategically cut holes in the foam, clearing the most direct path for the lighting wire and maximizing the 2 ft length as best as I could.
PAINTING

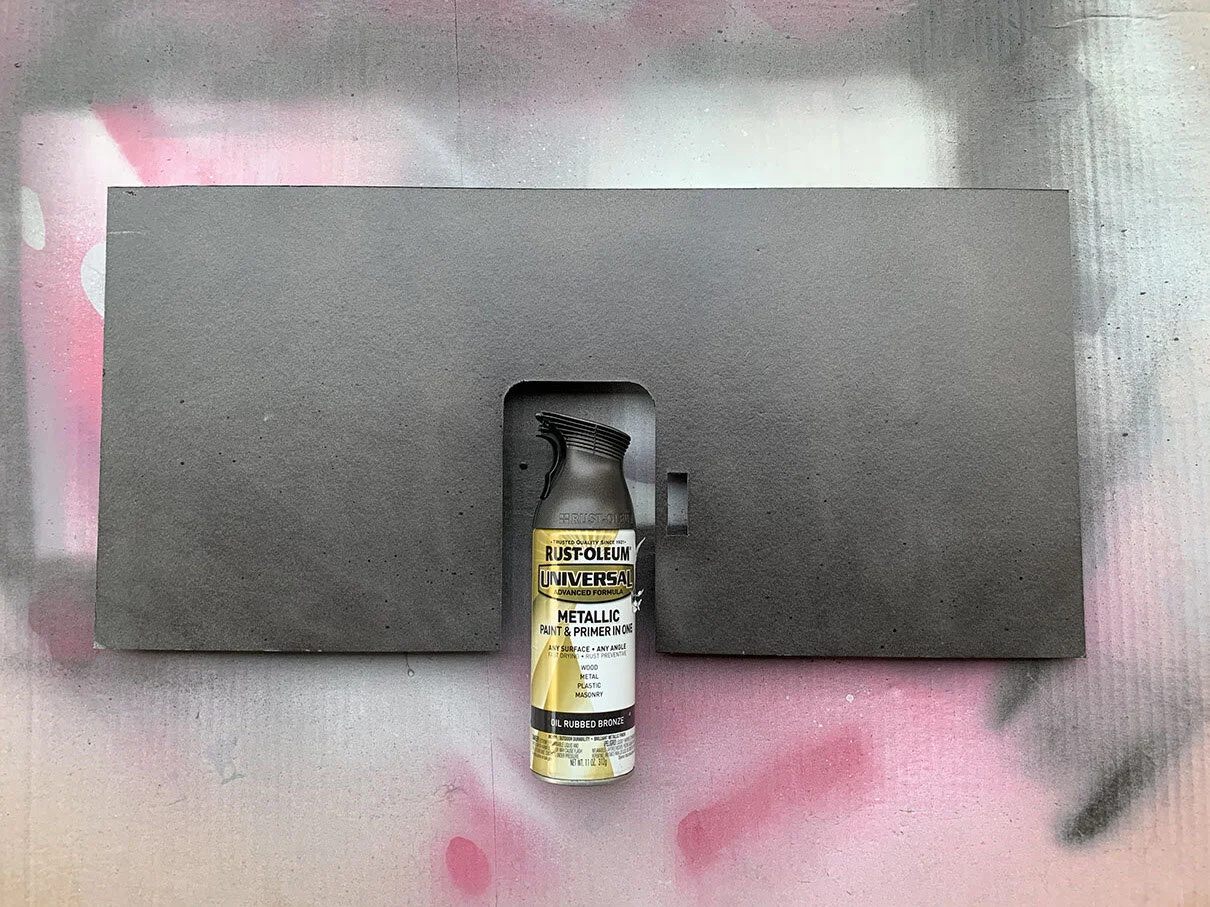

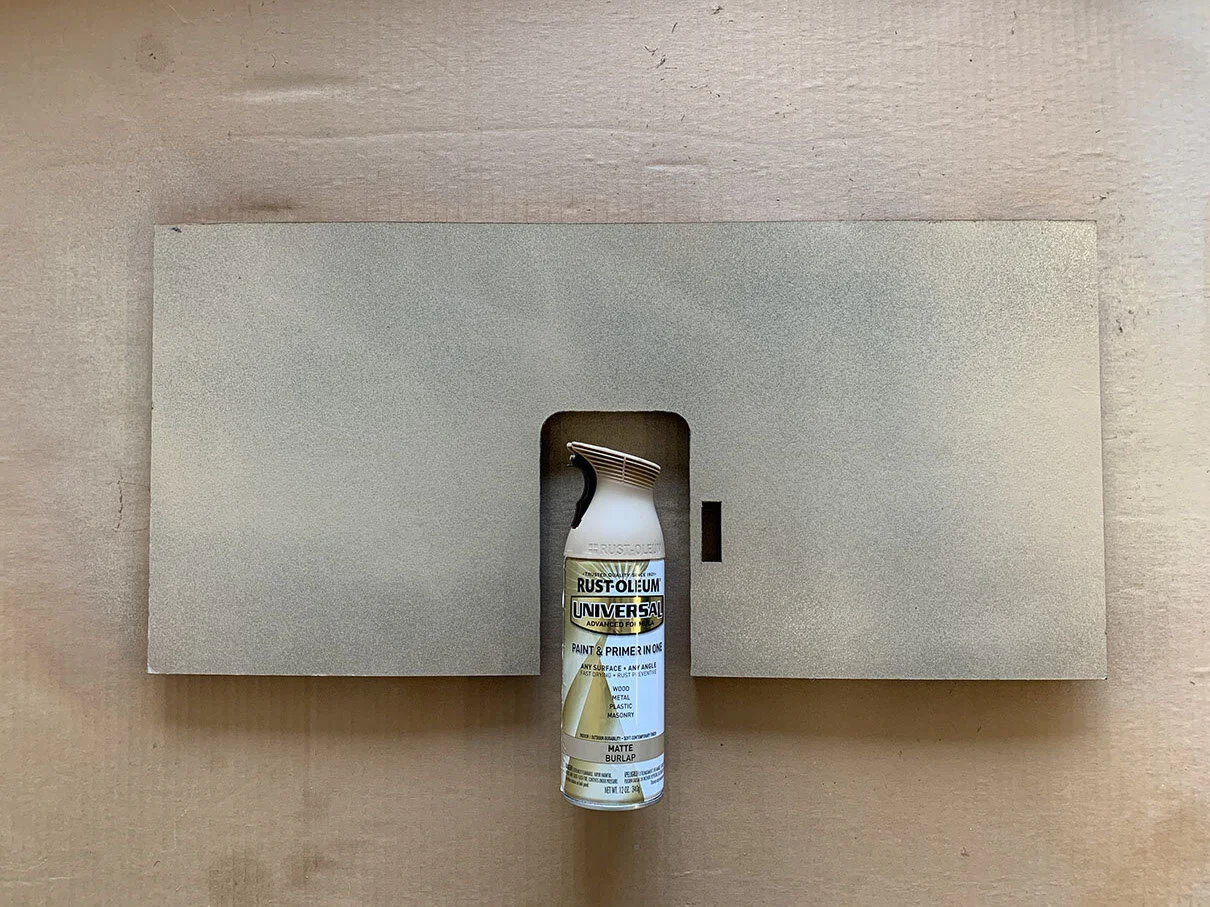


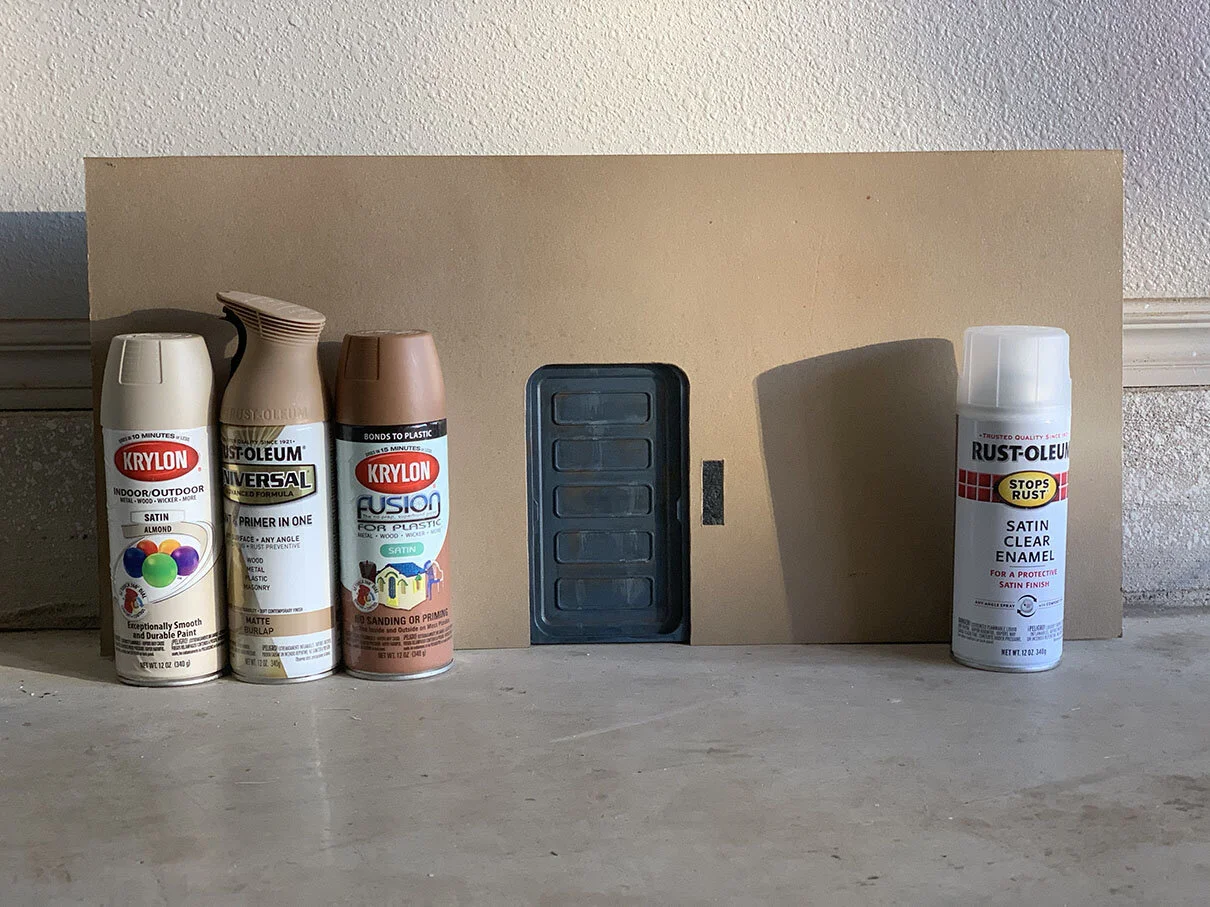
As paint application can be rather subjective, it’s really up to you as to how you want to go about doing it. The goal with painting the wall was to create an effect using various tones of light tans and browns, which would serve as a foundation before adding weathering. Following is the order of application for my wall.
Krylon : 2 in 1 Primer Filler
Rustoleum : Metallic Oil Rubbed Bronze
Krylon Fusion : Dark Brown Satin
Rustoleum : Burlap Matte
Krylon : Almond Satin
Rustoleum : Clear Coat
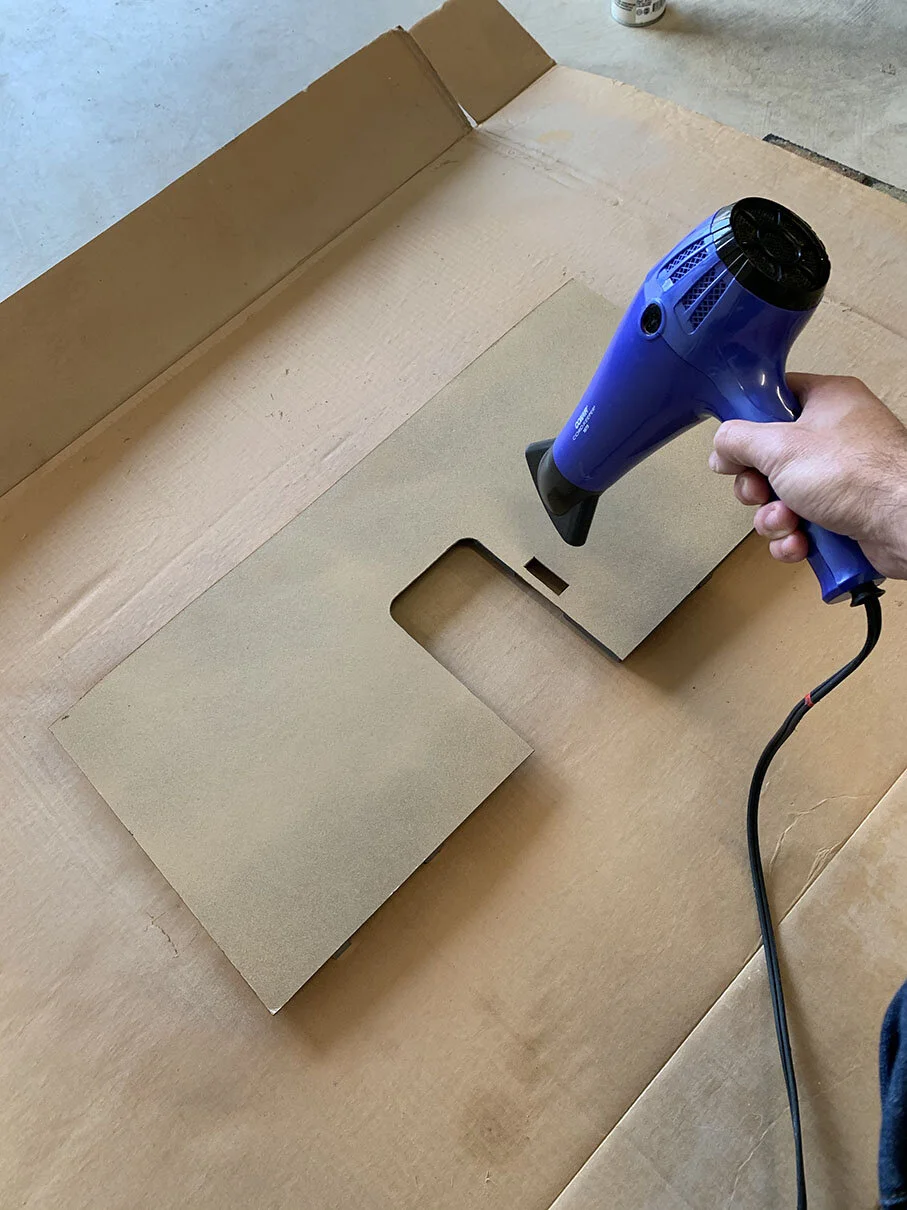
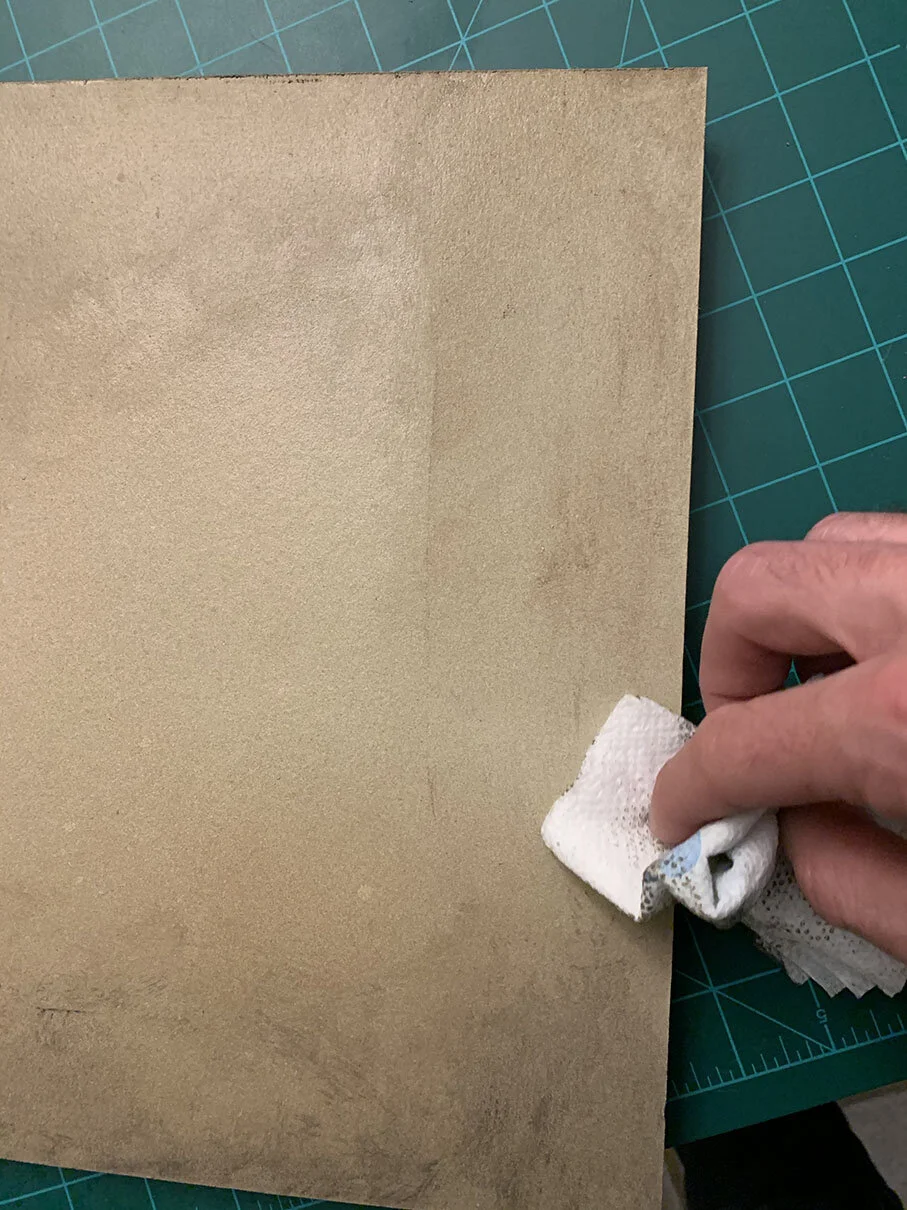
Each color coat was used sparingly as to let them build upon each other. The more you can vary the color across the surface, the more realistic it will appear. Because I can be rather impatient at times, I will occasionally use a hair dryer to help speed up the process in-between coats. Build up the paint as desired.
Once you’re pleased with the final look of the surface and have given it ample time to dry, apply at least one to two layers of Clear Coat. This final layer will not only seal in what you’ve done, but also allow a protective barrier underneath the weathering stage that follows. If you neglect to seal it, there is a chance that the weathering passes could damage the paint underneath and leave you with unwanted results.
Weathering

After you have a nice base coat, the next step (and arguably one of the most exciting steps) is to add some age to it. Personally adding the weathering, grime, and details are what really bring dioramas to life.
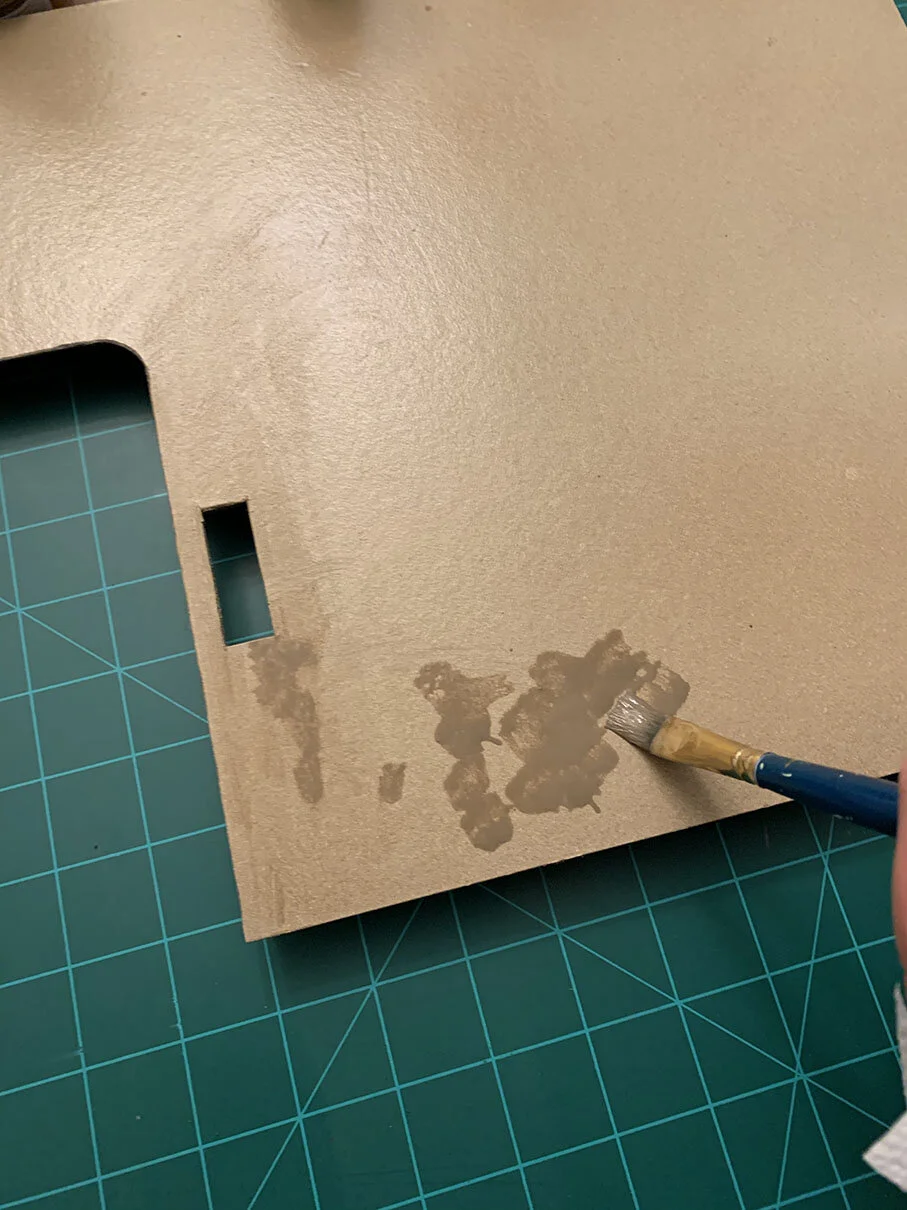
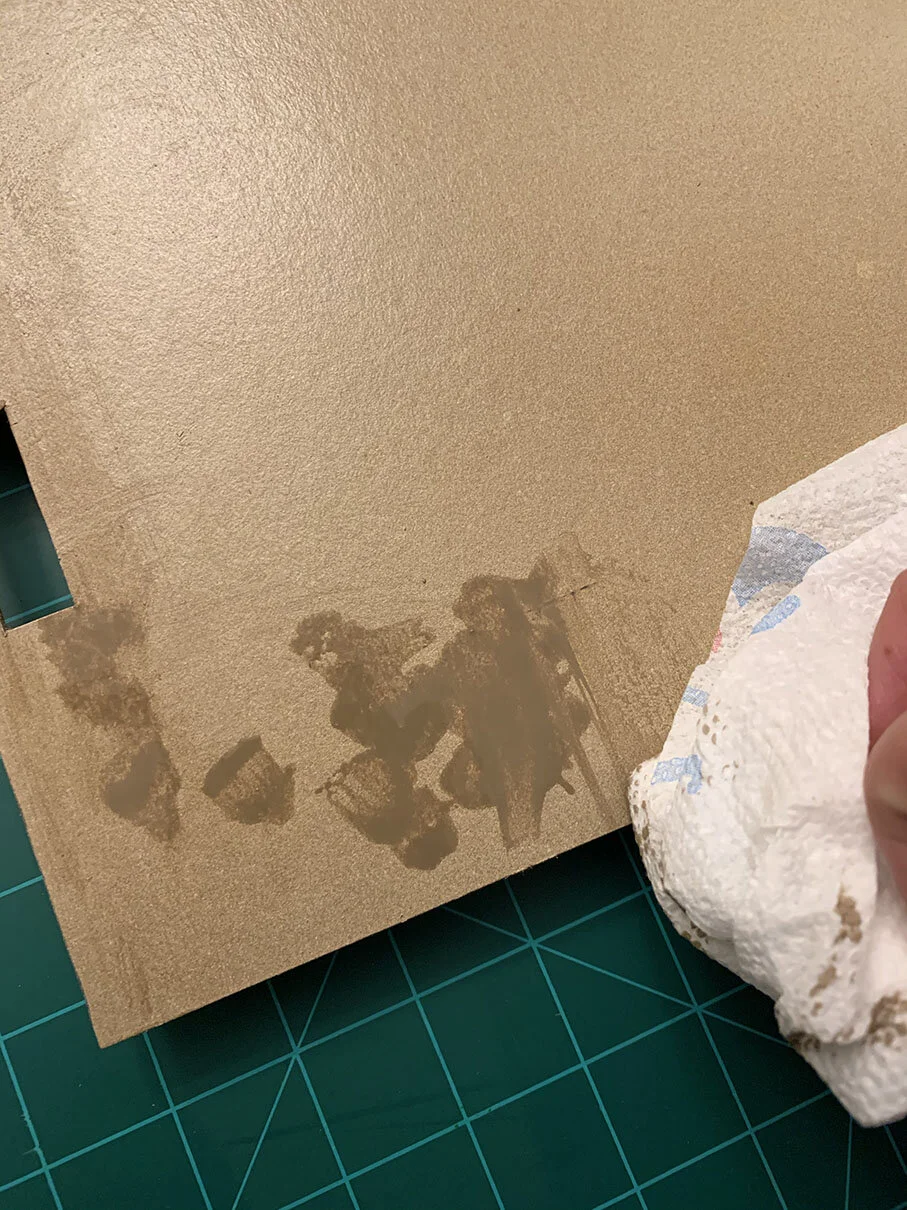
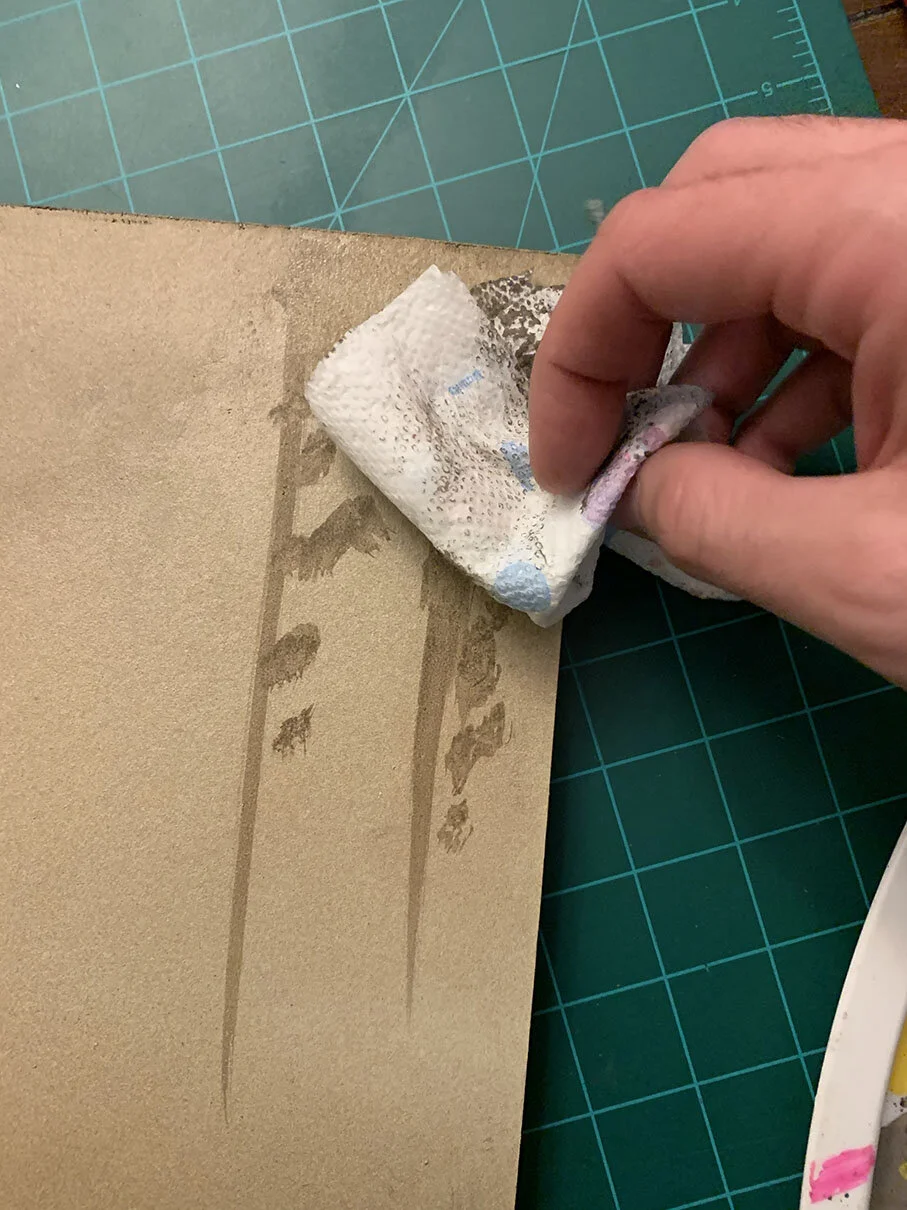
The technique I use is straight forward and easy to do which basically is apply on, wipe off. You can use any color that compliments your project. I prefer to use various shades of brown, adding a drop of color if so desired. Rarely will I use straight black, as it is a relatively dead color. If you want to use black, always mix in another color even if it is just a drop.
Create your wash by diluting your acrylic paint color so it has a similar consistency of milk. I like to use a paintbrush to apply the wash to the surface in small localized areas. Don’t be shy when it comes to putting it on the surface, however be sure to take your time to experiment until you feel comfortable.
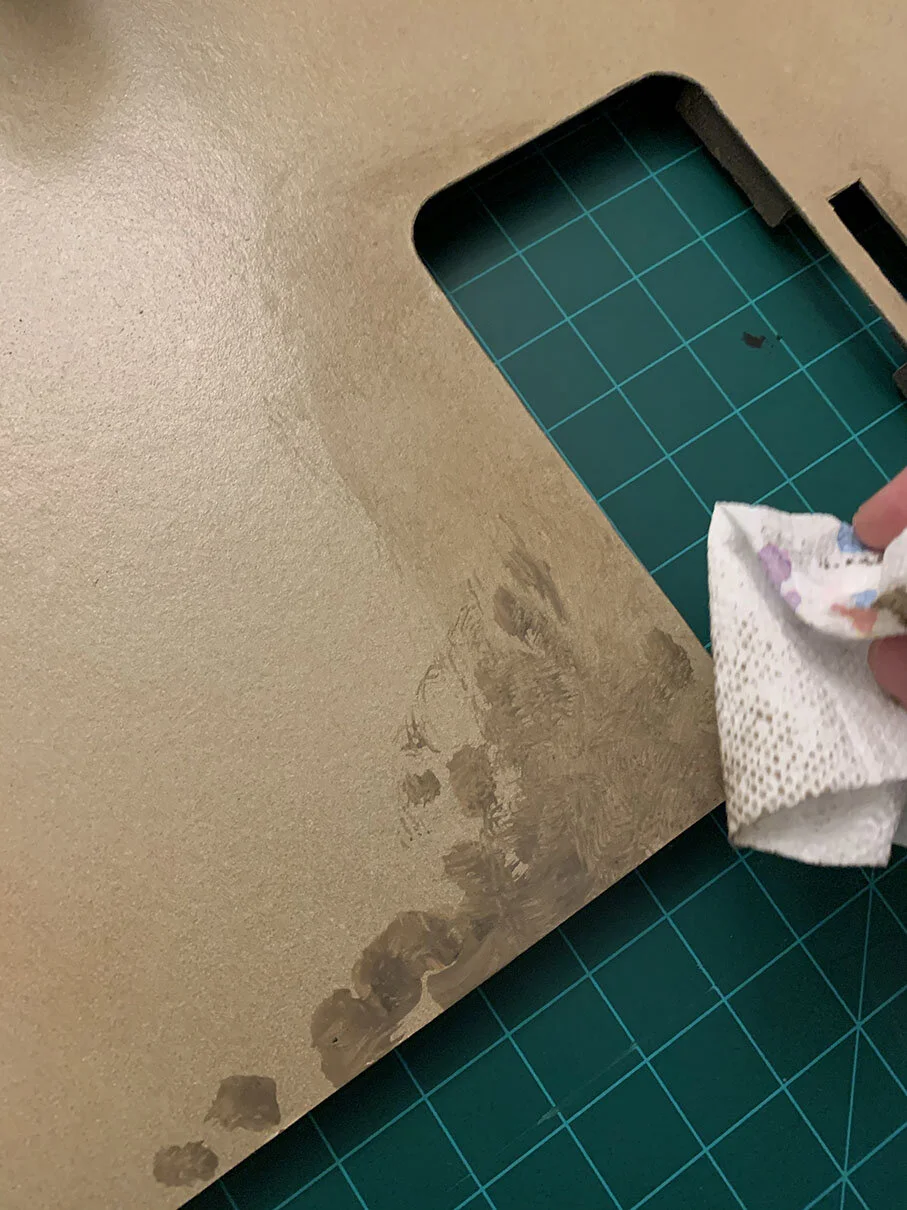
Once the wash is on, let it sit for several seconds so it has time to get into the little nooks and crannies. Next take a napkin, paper towel, or cloth to dab or wipe away the wash you just applied, being sure not to remove all of the wash. As a side note, leaving your wash on for longer periods of times will yield varied results, so feel free to experiment.
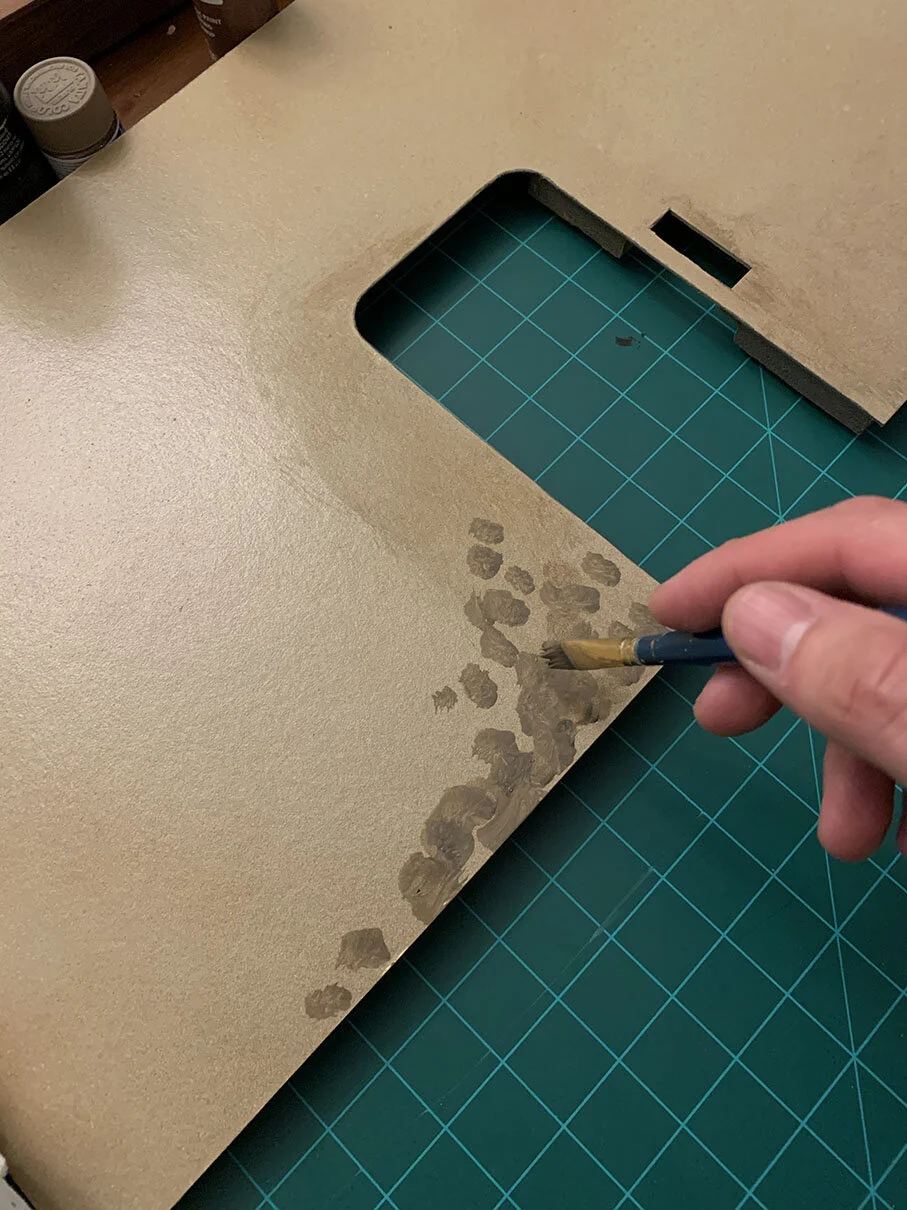
When removing the wash, you can wipe directionally to achieve some interesting results. For example, I wanted to achieve a dripping effect on the top portion of my wall. Instead of dabbing, I placed my paper towel at the top most area and dragged downwards while carefully wiping away the wash.
Continue to apply as much or little weathering as possible to achieve the desired effect. Once finished, your wall should look even more realistic as all those great surface details have been accentuated by this final weathering and detail pass. As I’ve said before, there really is no right or wrong way to paint and weather.
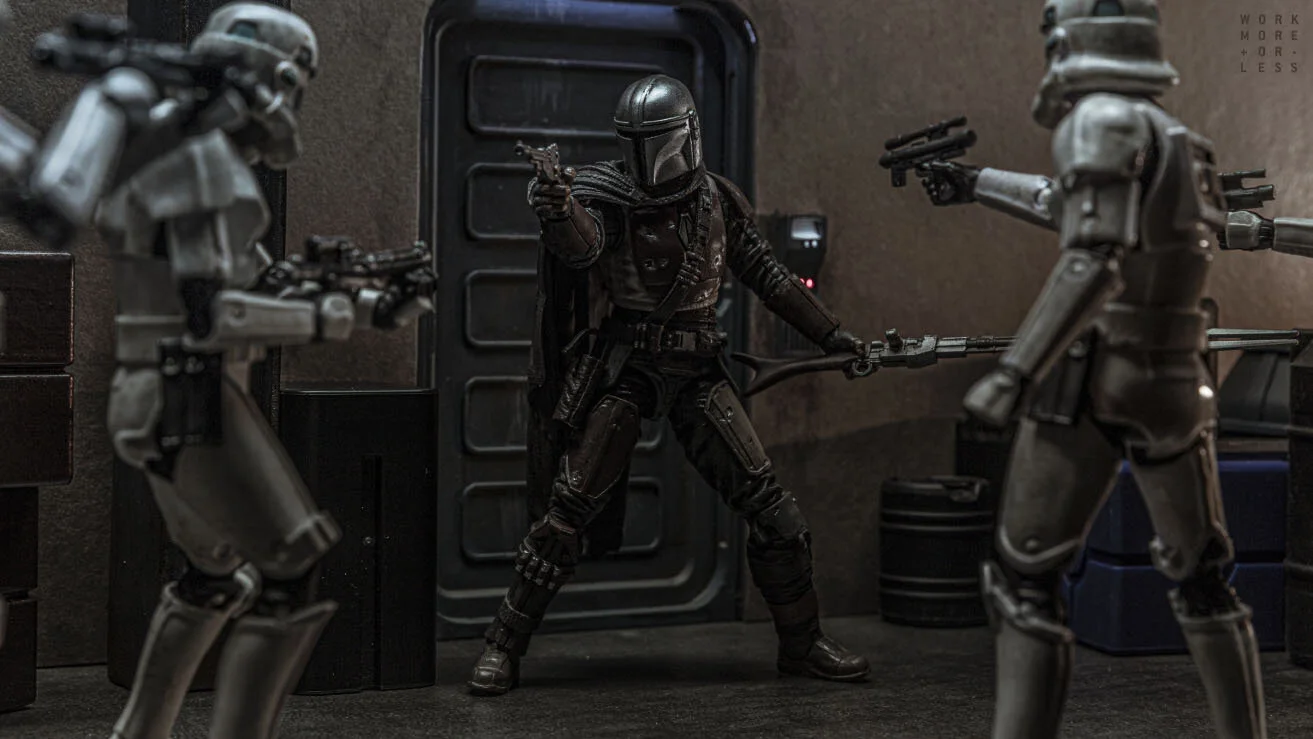
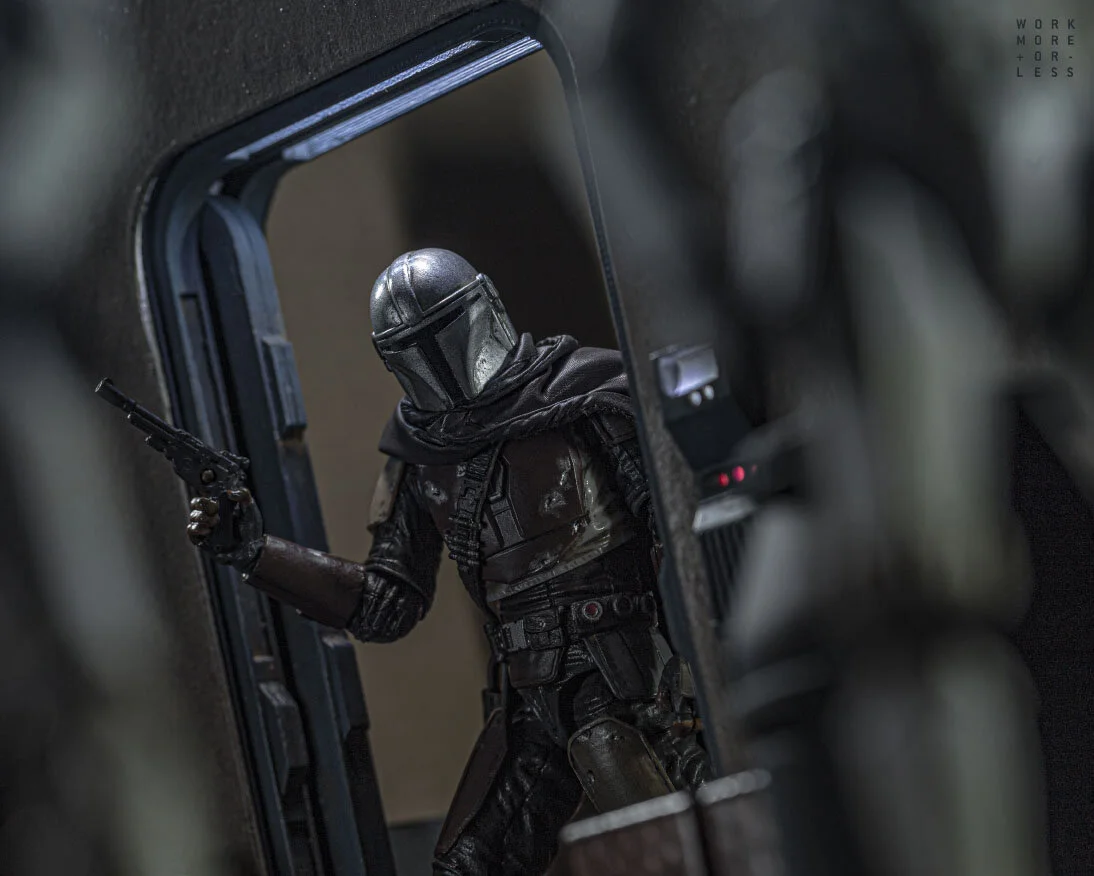
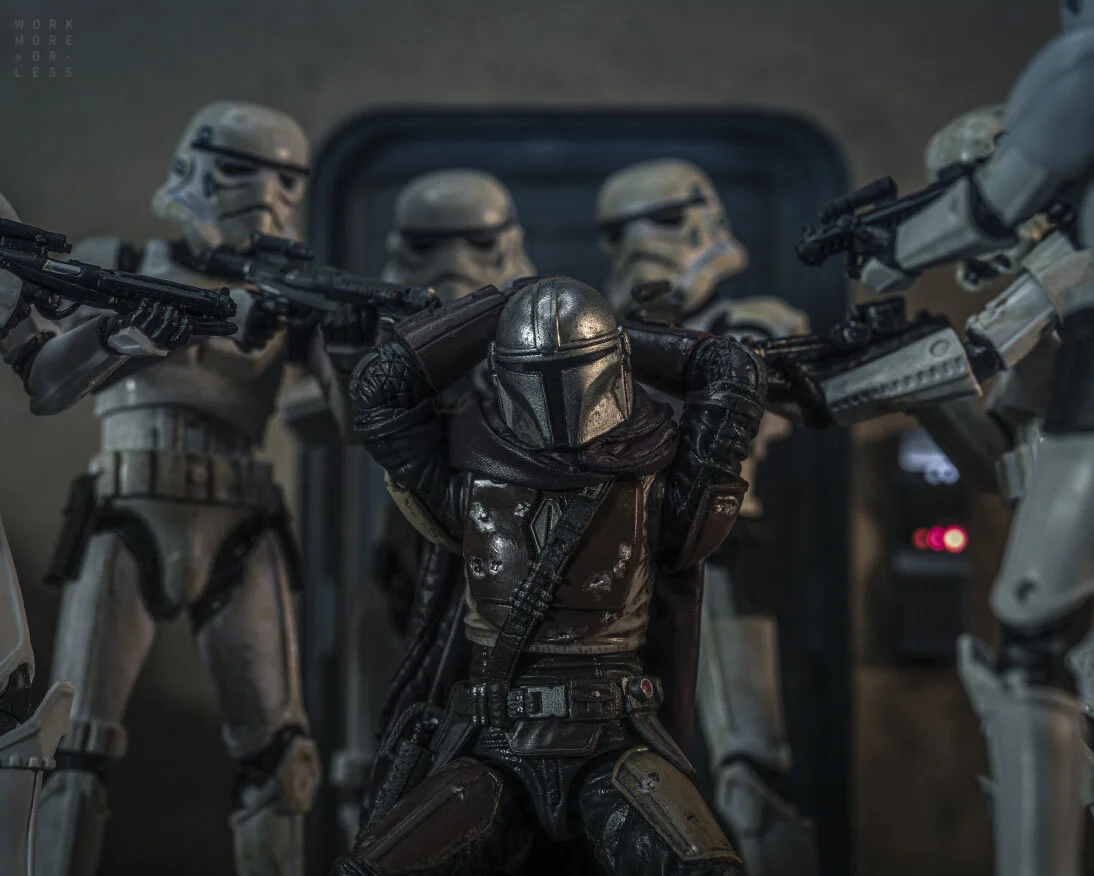
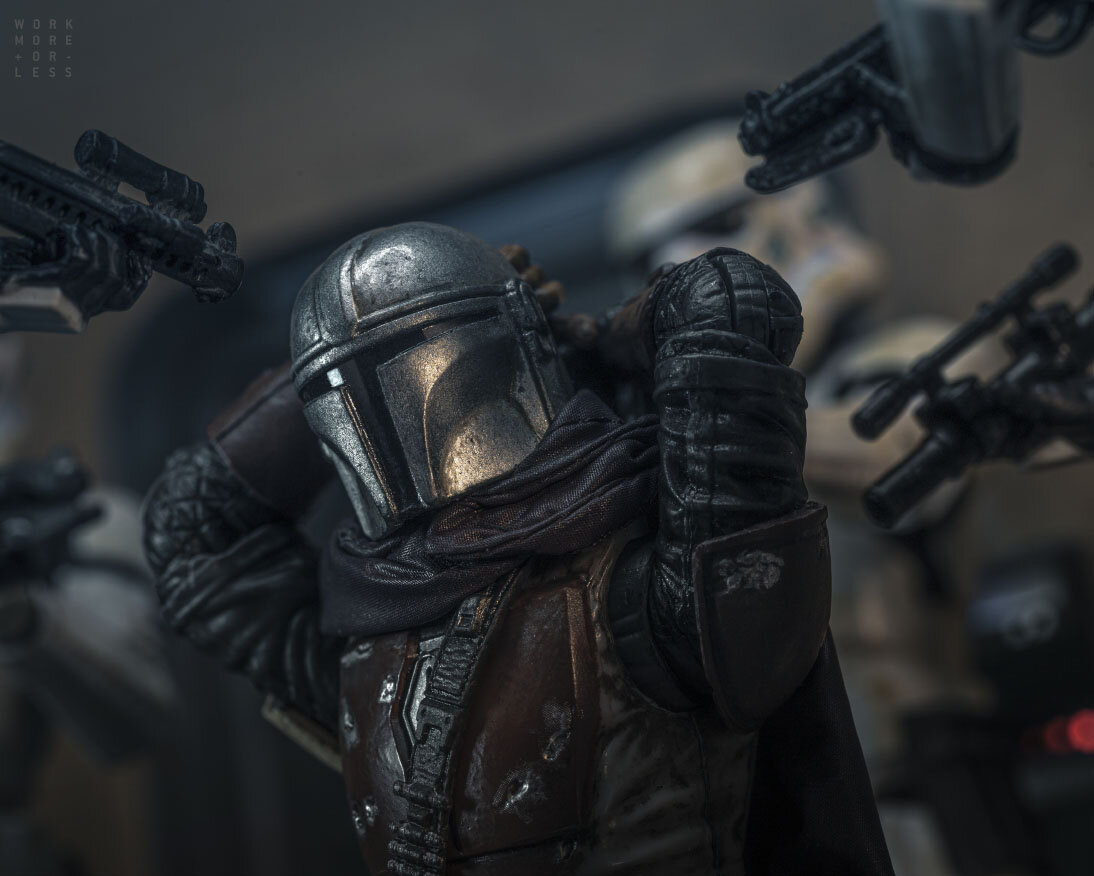
DIORAMA IN ACTION
Now that you have your own scratch built wall, you can use it for photos and display! I used mine for a few separate photo sessions and I couldn’t be more pleased with the results. Remember that there are no right or wrong ways to create your own diorama props, so have fun and enjoy the process. As always please feel free reach out if you have any questions or want to share your own results with me.