Rexin Around Office Diorama

INTRO
The Rexin Around Show is one of the best Star Wars podcast shows in the galaxy. Hosted by Michael (Captain Rex), Greg (Clone Commander), and Taylor (Shoretrooper), the Rexin Around trio provides entertaining insight to all things Star Wars.


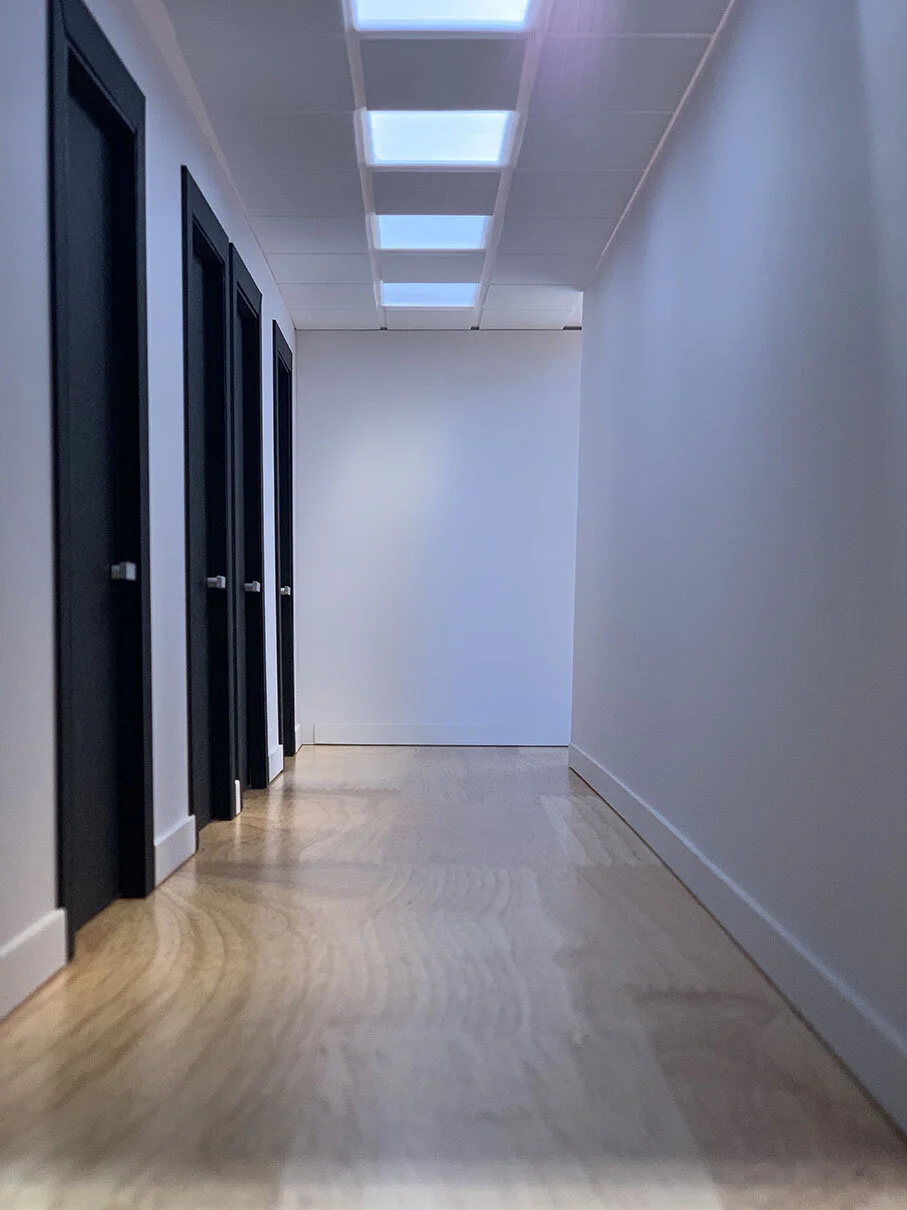
As a fan myself, I wanted to not only show my appreciation but also introduce others to the show through some good old toy photography. Inspired by the Rexin Around intro video of the guys suited up in full trooper armor, I decided to recreate the office hallway as a diorama in 1:12 scale. I already had the Hasbro Black Series versions of the three of them already, so the challenge was to create the scene to sell the concept.
The goal for this build is to recreate the office hallway seen in the intro to the show. I always try to gather as much reference material as possible, but in this case there isn’t a whole lot. However it is simple enough that these frames will really be all we need to get started.
HALLWAY
THE WALL
To recreate the office hallway, I decided to use inexpensive Elmer’s craft foam core that I purchased at Walmart. As a side note, I tend to buy extra on the off chance I make mistakes during the process. For this build I needed a minimum of 4 sheets for 3 walls and one ceiling.
Since I’m building this for 6” action figures at the 1/12 scale, I’m going to roughly base my measurements off of a 1 inch = 1 foot scale. To be honest, I tend to eyeball proportions vs. being too strict on exact measurements. For this build I plan to create 4 door frames spread out along the left wall. I didn’t want to make them each equally distributed along the wall, so I put a little additional space between the two middle frames. This helps break up the wall and make it feel a little less uniform.
After using a pencil to mark out the door frames, I take an X-acto knife with a fresh blade to cut out the door space. Be sure to make your cuts as straight and clean as possible, focusing on perfecting all of your right angles. The better your cuts, the easier it will be to add the black door frame and trim.


Throughout the various stages of building, I like to test-fit the various pieces and in this case, set up the walls around the characters to see my progress in context. When you come across something that isn’t right, you’ll have the opportunity to address the issues sooner than later which can make a huge difference in the end.
DOOR FRAMES
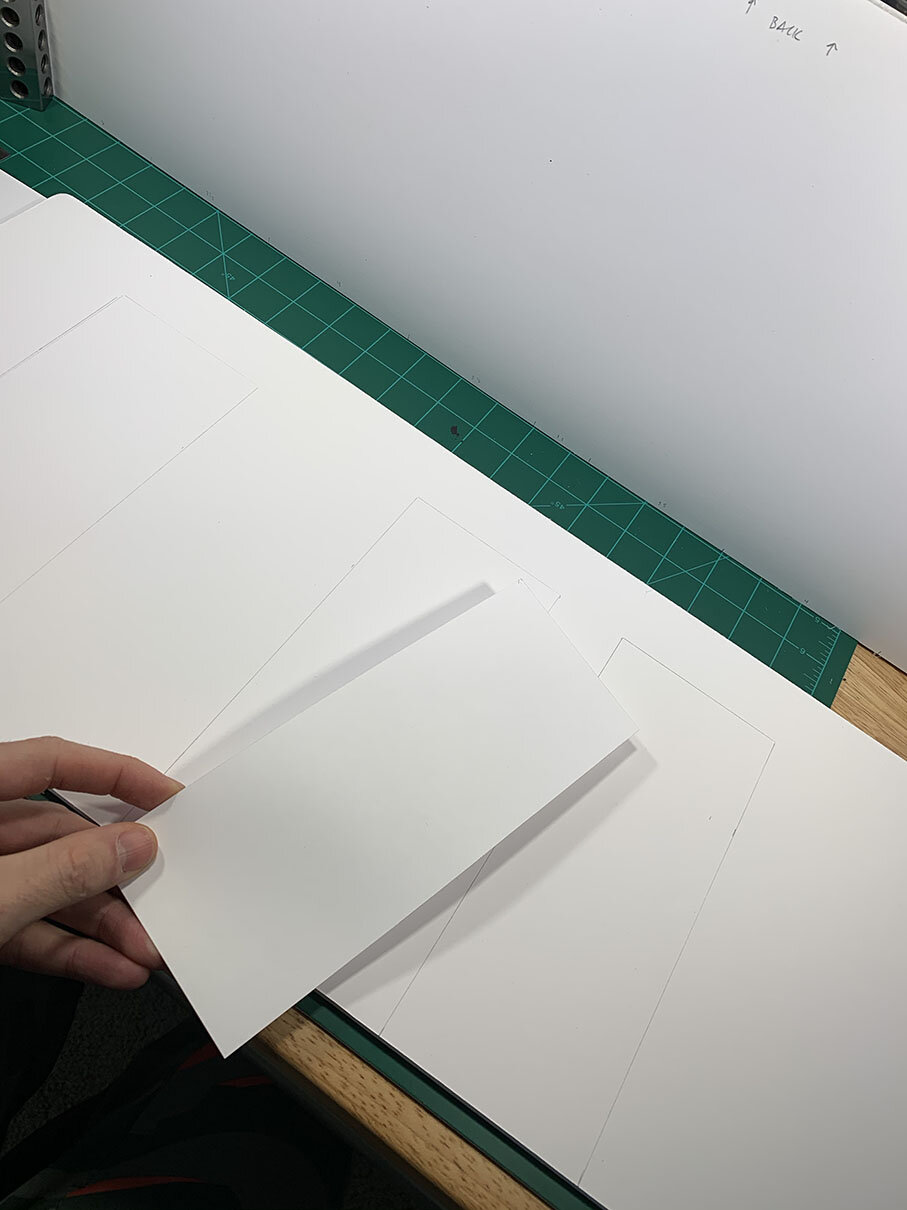
Moving on to the door frames, I decided to use standard black mat board that I could easily cut into strips to build out the frame. I considered spraying the black strips with a clear satin or gloss varnish to give it sheen, but in the ended thought that was an excessive step for my purposes. I cut the inside strips to the same thickness as my mat board and varied the lengths as necessary.


For adhesion, I’ve been loving the insta-cure cyanacrylate glue for my builds as it bonds extremely well in a short amount of time. Once the frames are complete, I cut out strips of white mat board to act as the baseboards to complete the office hallway look.
DOORS


I don’t have any plans to include working doors, so for this I’m going to just cut additional mat board and place them on the backside of the wall. However, I wanted the ability to swap out the door surfaces in the future, so I didn’t want to just glue them to the wall. My quick solve for this was to build somewhat of a track system that the doors could slide into. It was as simple as using a few strips of mat board on the backside that allowed enough clearance for the door width to easily slide in and out.
DOOR HANDLES

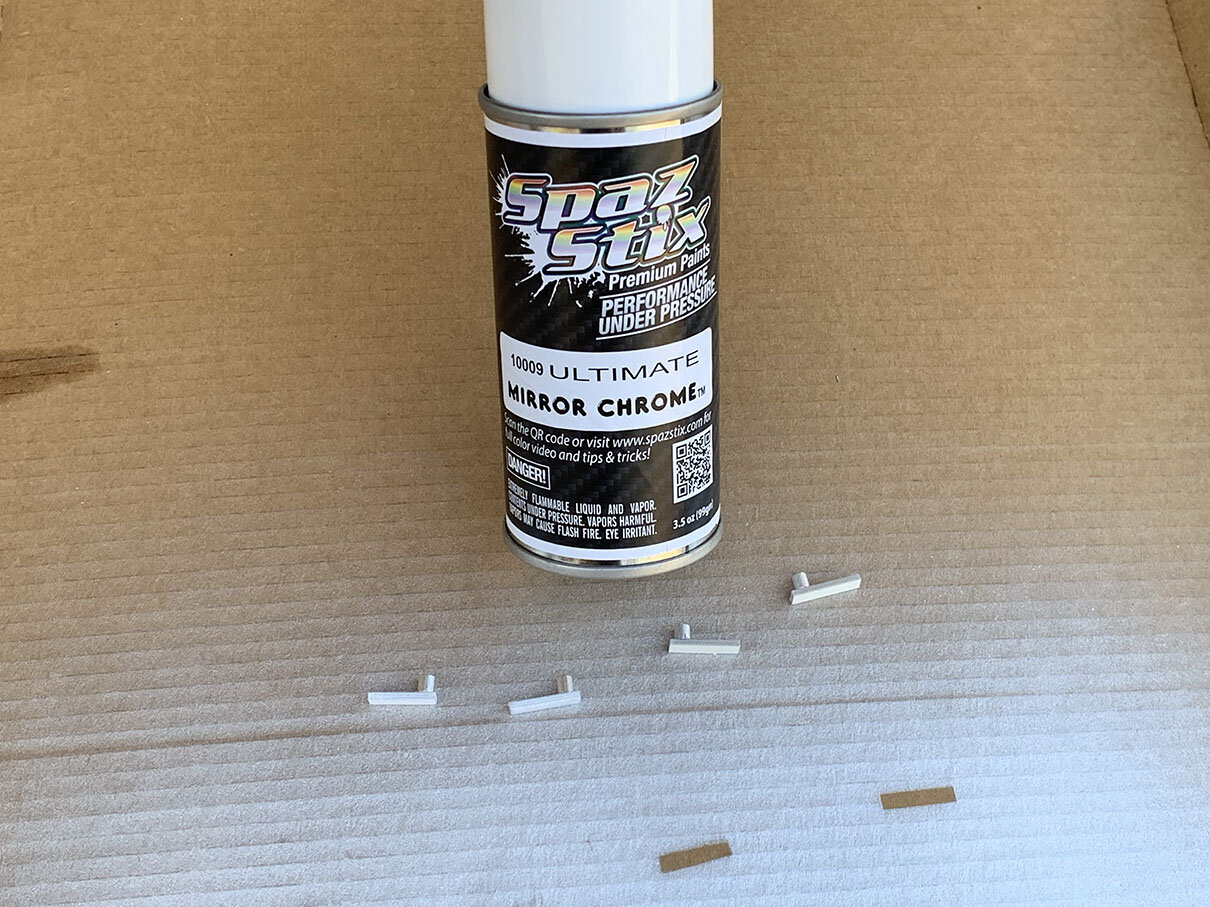


To give them the actual appearance of doors, the only necessary thing left to add were the door handles. Looking at the screen grab reference images, I can’t really tell what type of door handles are in the physical offices. Since I’m not going to focus on them in the shots I have planned, I’m just going to keep it simple. I used one of the many mat board scraps to create small rectangles, and cut small pieces of a dowel rod to act as the handle. Once I’ve glued them together, I give them each a couple of coats of Spaz Stix Ultimate Mirror Chrome, followed by Spaz Stix Ultimate Clear Coat. Once dry, they can be glued directly to the door surface. I use the action figures to figure out the relative height and proper location for the handles.
CEILING
The next phase of the build is to construct the ceiling. Since the shots I’ve planned will be framed at a low angle looking upward, I really wanted to make sure there is enough detail on the ceiling to sell the idea that this is an office hallway. Besides the visual aesthetics, it was equally important that the ceiling was sturdy enough to support my light panels.


To achieve the look of the dropped office ceiling, I chose to use craft foam sheets at a thickness of 2mm to represent the acoustic panels. Again, I decided to eyeball the measurements and went with a simple 2”x 3” rectangle used for the both the acoustic and light panels, which are spaced about .25” from one another.
Though you can purchase various types of translucent plastic, I like the idea of sourcing recyclables and reusing when I can. In this case a used plastic milk jug served as a great option, Unfortunately with the curvatures of the jug, there were only a couple of spaces that were flat enough to use for the dimensions required. Either way, I saved money, time and was able to reuse what I already had laying around.


The process was tedious due to measuring the placement for each tile and light hole, but in the end it was worth the effort. In the end I was able to fit 4 light panels in the ceiling which would allow for plenty of light for the scene. As alway, I had to set everything up to see how it was working in context. It all worked perfectly!
TEST SHOTS


Once the dio was completely finished, I cleared off my workspace and constructed the whole diorama to do a final look before taking it into the studio to start shooting. Instead of breaking out my DSL Canon 6D, I will use my phone camera to try some test framing with the dio. I used temporary overhead desk lights for this setup, but realized it was going to require a lot more power to fully light the scene. As I’m doing these test shots, I took mental notes about the lighting needs, logistics in setting up the scene, and how to pose the characters. Once I was happy with it, I made my way into the studio to get the shots.
FINAL SHOTS


Building your own diorama pieces adds an incredible amount of character ownership to your work. Yes it does require more investment in time and materials to dive in and do it yourself, however the payoff is always worth it. If you’ve made it this far and haven’t already checked out The Rexin Around Show, do yourself a favor and do that now. As always thanks for all of the amazing support!
PURCHASE ON SOCIETY6

Power Stance
Rexin Around Phone Case

ENTRY
Rexin Around Sticker

HALLWAY
Rexin Around Pillow