Camera Tracking

This year I’m exploring various visual effects techniques to implement into my work. To celebrate the International Day of Human Space Flight, we'll use a technique called camera tracking to create a practical, in-camera lightspeed effect! As a long-time fan of Lego and the original Space series, I thought it fitting to feature my 6931 FX Star Patroller with Benny from The Lego Movie in the cockpit.
WHAT DO YOU MEAN BY “CAMERA TRACKING”
Camera Tracking is a common method used in photography and cinematography that captures images of an object in motion while maintaining the clarity and focus of the subject. There are various camera tracking techniques that have been developed over time which include the Dolly Shot, Trucking Shot, Crane Shot, Steadicam Shot, Aerial Shot, and Vehicle Mount Shot to name a few.
Dolly
Shot
The French Dispatch

TRUCKING
SHOT
The Grand Budapest
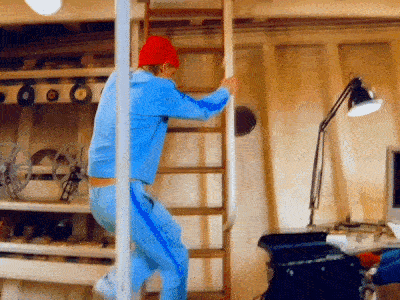
Crane
Shot
The Life Aquatic with Steve Zissou

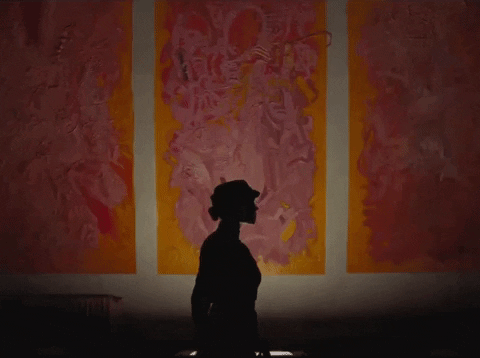
Steadicam Shot
Moonrise Kingdom

Aerial
Shot
The Fantastic Mr. Fox
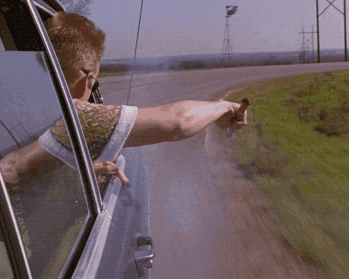
Vehicle Mount SHOT
Bottle Rocket
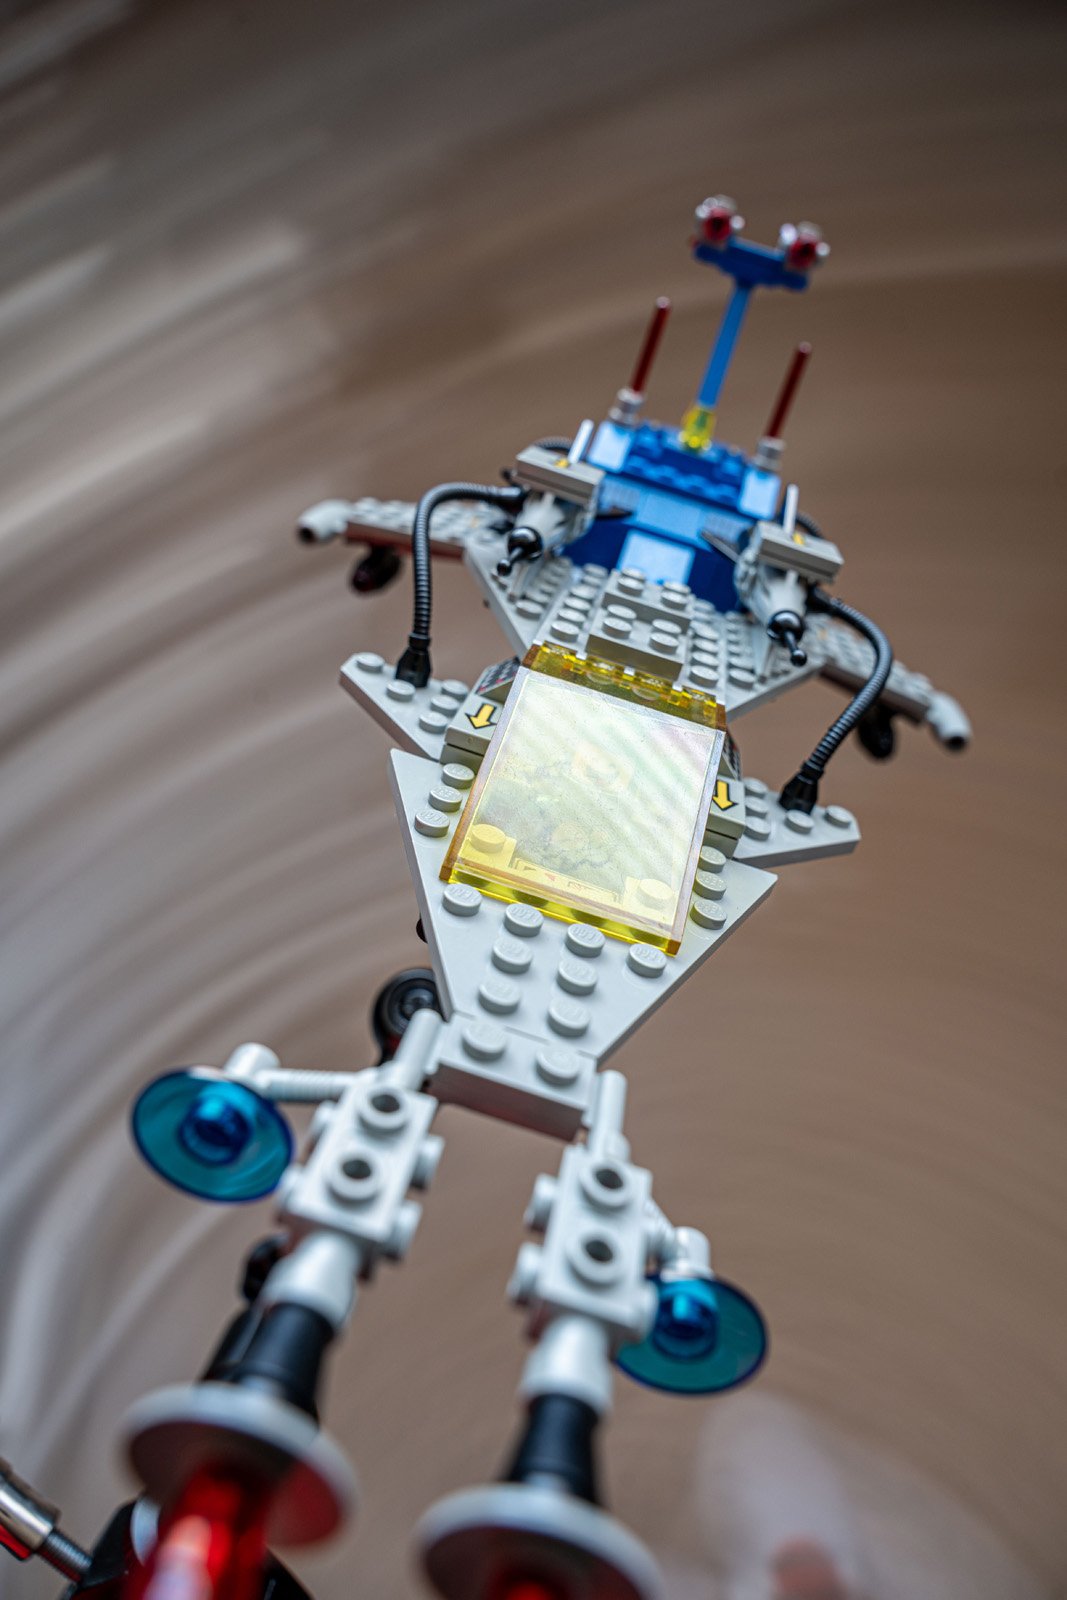
For the photo I produced for this exercise, I used a modified Vehicle Mount to achieve the desired result. Due to the scale and nature of toy photography, one could argue that the Lego ship is technically mounted to the camera, however, the end result is very much the same.
HISTORY OF THE TECHNIQUE

VEHICLE MOUNT
Mounting cameras to vehicles for cinematography dates back to the early days of filmmaking. One of the earliest known uses vehicle mounting was in the 1913 short film series "The Keystone Kops, directed by Mack Sennett, Henry Lehrman. In this film, a camera was mounted on the front of a car and used to capture a high-speed chase scene.
PREPARING THE PROPS
LOVE FOR LEGO
Lego is something I have always loved to build with and collect, even today. As a kid, I was particularly drawn to the LEGOLAND® Space series that was introduced in 1978 and evolved throughout the 80s and 90s. The FX Star Patroller #6931 was among the many sets that made it into my collection and provided years of entertainment. It made complete sense to feature it for this concept that celebrates the International Day of Human Space Flight.


CUSTOM Modifications
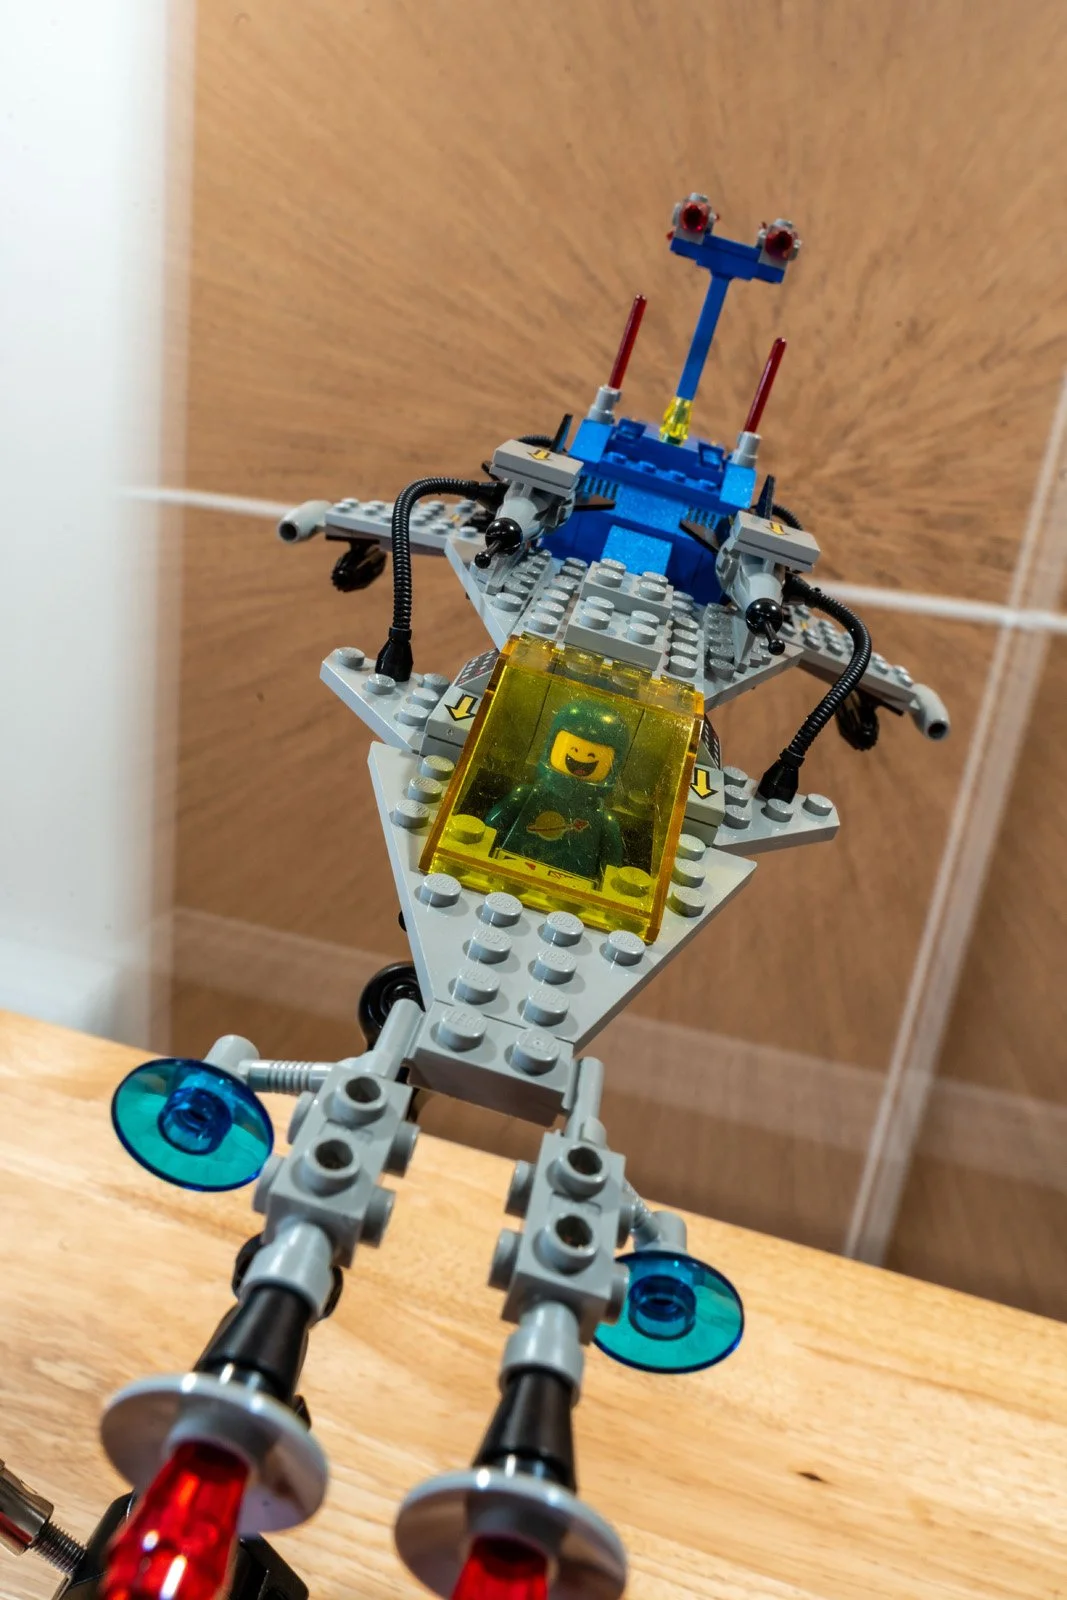
To add an extra level of fun, I chose to swap out the original minifig that came with the FX Star Patroller for Benny from the 2014 film aptly titled The Lego Movie. Benny was the perfect fit due to his love for late 1980's space tech and expression on his face. Since Benny wears a blue suit and the cockpit windshield of the FX Star Patroller is also blue, I determined that swapping the windshield out for a yellow one would make Benny more visible.
Since the theme I chose to put emphasis on human space flight, I thought that adding the Earth within the shot would help sell the idea. I did some research on the best ways to build the Earth out of LEGO but ultimately made my own creation. Fortunately, I didn't have to put in a ton of detail because it was meant to be out of focus in the distance.


CAMERA RIGGING
USING THE SMALLRIG SYSTEM
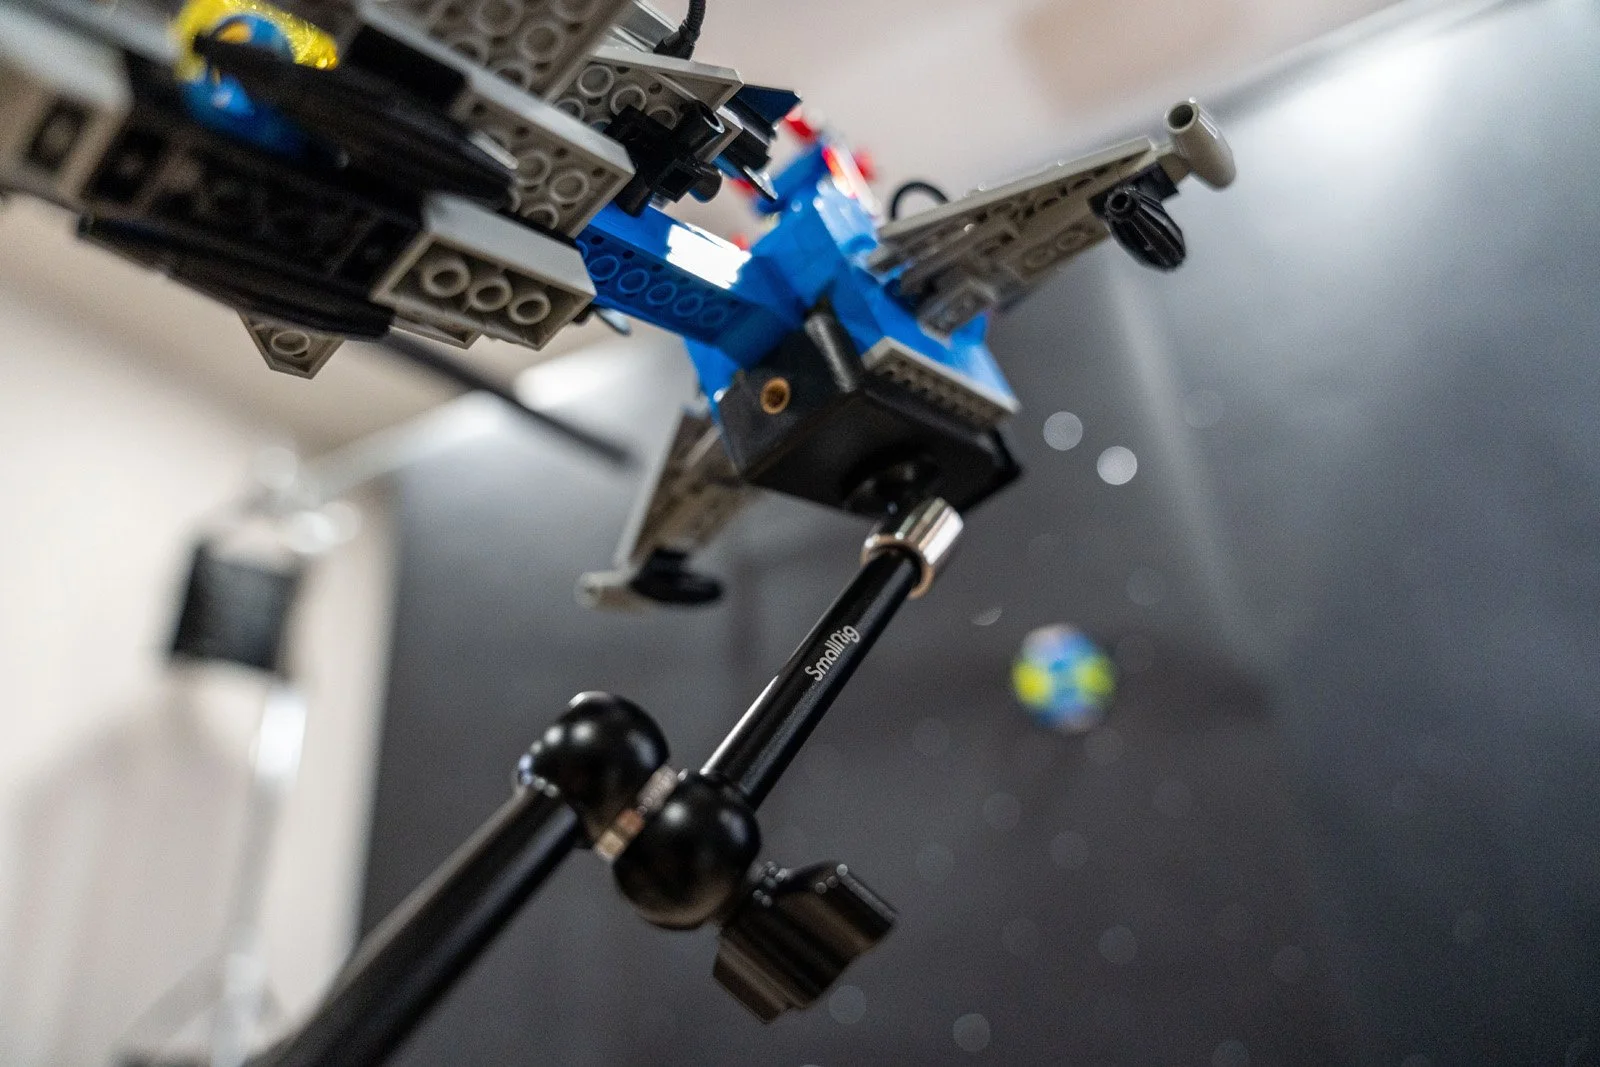
o create the vehicle mount, I spent a good amount of time trying to figure out the best solution. For gear related questions, it's alway a relief to have friends who are knowledgeable and can provide solid insight - Andrew Saliga always comes through! He introduced to the Smallrig system and allowed me to test drive the equipment he owned. It wasn't long after trying it out that I knew it was equipment worth investing in.


I started with the Smallrig Full Camera Cage to act as the foundation of the rig. The cage is incredibly easy to install with a single screw that connects it to the bottom of the camera. With multiple 1/4"-20 holes and 3/8"-16 positioning holes, the frame allows for endless configurations that make it an extremely valuable tool.
As one would assume, Smallrig also has a diverse range of attachments that work together. Their Desk Mount and Articulating Magic Arm were the best solution for my needs. With the camera cage securely attached to the top of the desk mount, the horizontal extension arm provided extra distance from the camera to allow for wider framing.
For the sake of keeping my LEGO vehicle mount as small and agile as possible, their Articulating Magic Arm worked extremely well for this build-out. To connect the spaceship, I used a phone mount that gripped the spaceship with the perfect amount of tension and simply screwed it onto the end of the arm. From there, I used the friction power wingnut to adjust the framing of the spaceship to achieve the best composition. With my custom rig fully built, the camera and spaceship were securely connected giving me the ability to achieve the effect I had planned.


HOW IT WORKS
ACHIEVING THE EFFECT
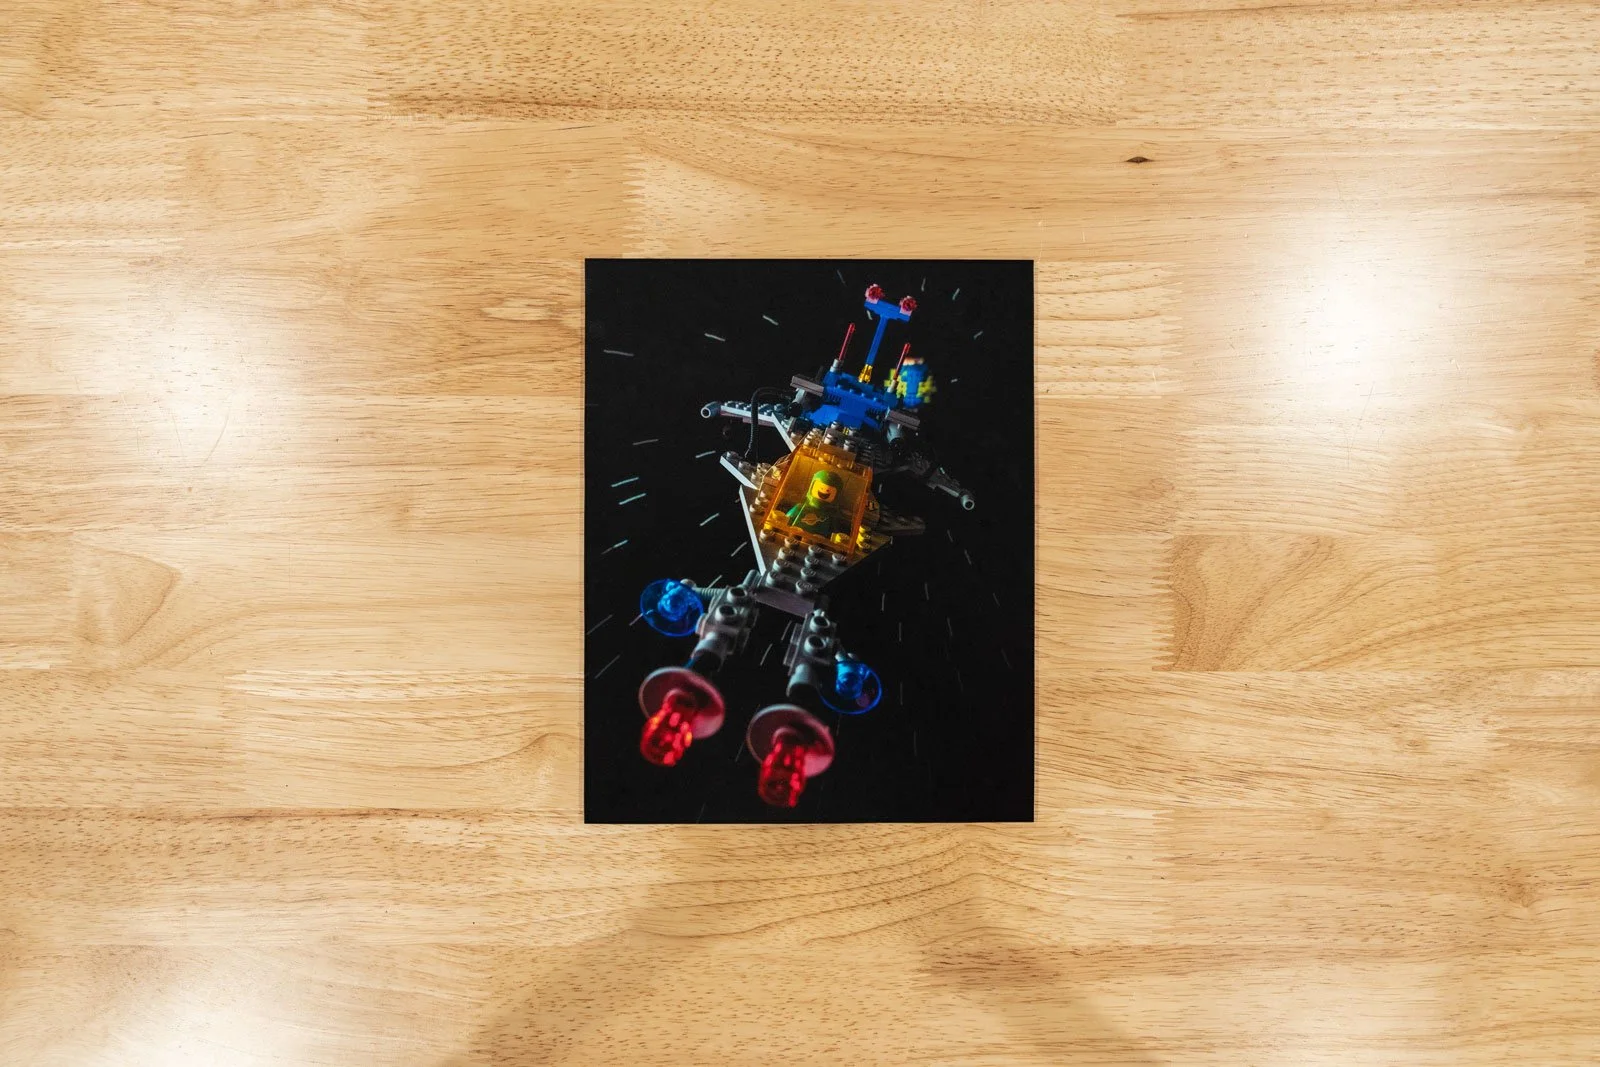
Using this vehicle mount camera tracking method, the goal of this shot was to capture a feeling of space travel. By using a long exposure while moving the camera away from the background, the stars and earth would blur giving a hyper-speed light streak effect. However, with the spaceship mounted and linked to the focal length of the camera, Benny and the spaceship would be stable during the exposure and stay in sharp focus. Prior to the full setup, I did some quick tests which demonstrated that my proof of concept worked!
The last step was to poke holes in black paper and hang them from a c-stand. Using 2 LED light panels, I bounced the light off of sheets of aluminum foil and white foam board to reflect light through the holes, giving the illusion of a star field. Finally, I attached my LEGO Earth using gaff tape to complete the backdrop.


Lighting the rest of the scene was straight-forward and only required a couple additional lights. Mimicking the natural sunlight within our solar system, one primary key light was placed to the left of the scene. For this, I chose my GVM LED Ring Light as it casts relatively even light over a wider distance. I placed a Phillips HUE bulb with a handmade snoot and focused it on the Earth to give more depth and dimensionality. Without that accent light, the Earth ended up feeling flat and seemed to get lost in the shot.


CAPTURING THE SHOT


To be honest, the most challenging part of creating this image wasn't shooting, but everything that led up to that point. Capturing the image was pretty quick and incredibly simple! I ultimately used a 2" exposure and moved the camera away from the Earth and star field within that duration.
As always, I did a number of test shots to dial in the correct settings for capturing the best image possible. I found that the shorter the exposure, the less wobble appeared in my star streaks. Since this was a hand-held rig, every little step I took was noticeable, so the key was to make my movements as smooth and lateral as possible. Stability during the exposure time produced the best result.
If I owned a motion-controlled camera slider, that would have captured perfectly straight streaks, however, doing it hand-held made this a fun challenge.
BLAST OFF WITH CAMERA TRACKING!
THE FINAL RESULT
My exploration with camera tracking and vehicle mounting produced some excellent learning outcomes. I have merely scratched the surface when it comes to understanding the numerous approaches for tracking a subject. However, I am excited about taking the knowledge I gained and applying to other scenarios in the future.
If you have tried this technique in any of your work, tag me in your posts on instagram and use the hashtag #wmolcameratrack in your shots! I'd love to highlight your work and share it with the community. Since this is an ongoing series, what other techniques should I explore?
Thanks for learning with me and hopefully this inspires you to get creative with your next project.

THE PRINT
As part of my series that explores techniques of visual effects, my exercise in camera tracking resulted in this concept called “Spaceship!”.
“Spaceship!” is an archival-grade print on Fuji Crystal luster photo paper and mounted on black styrene board for long-lasting durability. Please allow up to 2 weeks before your order arrives.
Currently available for US and Canada orders only. Please email info@invisibleelement.com if you would like a custom quote for shipping or have additional inquiries.


As part of my series that explores techniques of visual effects, my exploration of camera tracking resulted in this concept called “Spaceship!”.
“Spaceship!” is an archival-grade print on Fuji Crystal luster photo paper and mounted on black styrene board for long-lasting durability. Please allow up to 2 weeks before your order arrives. Shipping included!
Currently available for US and Canada orders only. Please email info@invisibleelement.com if you would like a custom quote for shipping or have additional inquiries.