Multiple Plane

The Multiple Plane technique is something I have been eager to dive deeper into since beginning my exploration of visual effects techniques. This practical, in-camera trick is created by placing objects on horizontally layered clear glass or acrylic with the camera above shooting down toward the layers. For action figure photography, it is an extremely simple way to achieve the look of mid-air flight or floatation. When thinking about the perfect action figures that could showcase the power of this technique, Spider-Man immediately came to mind. With the release of Across the Spider-verse, it was also a great reason to “invest” in the new Hasbro Marvel Legends figures and use them for this exploration.
HISTORY OF THE TECHNIQUE

MultiPLE plane ORIGINS
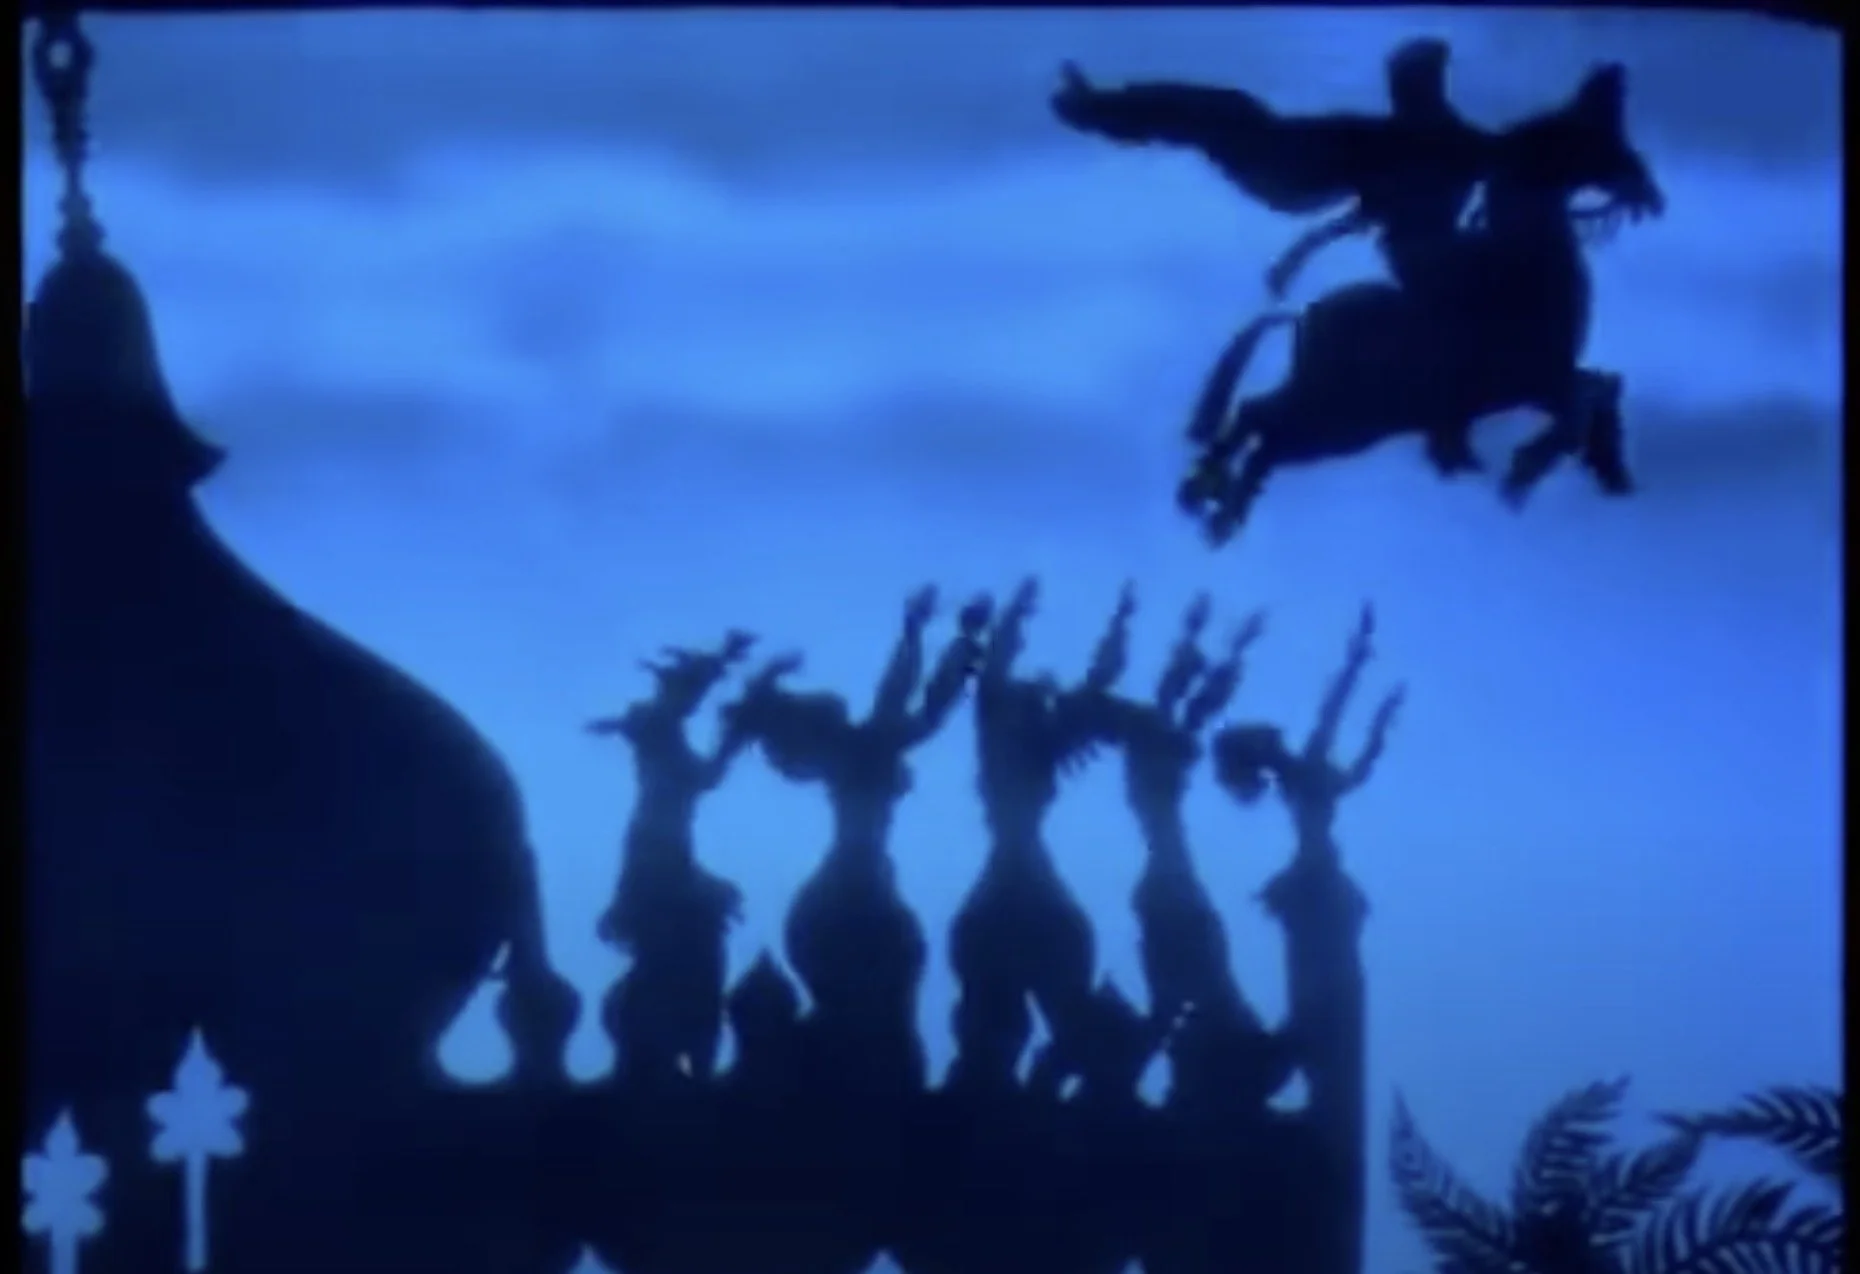
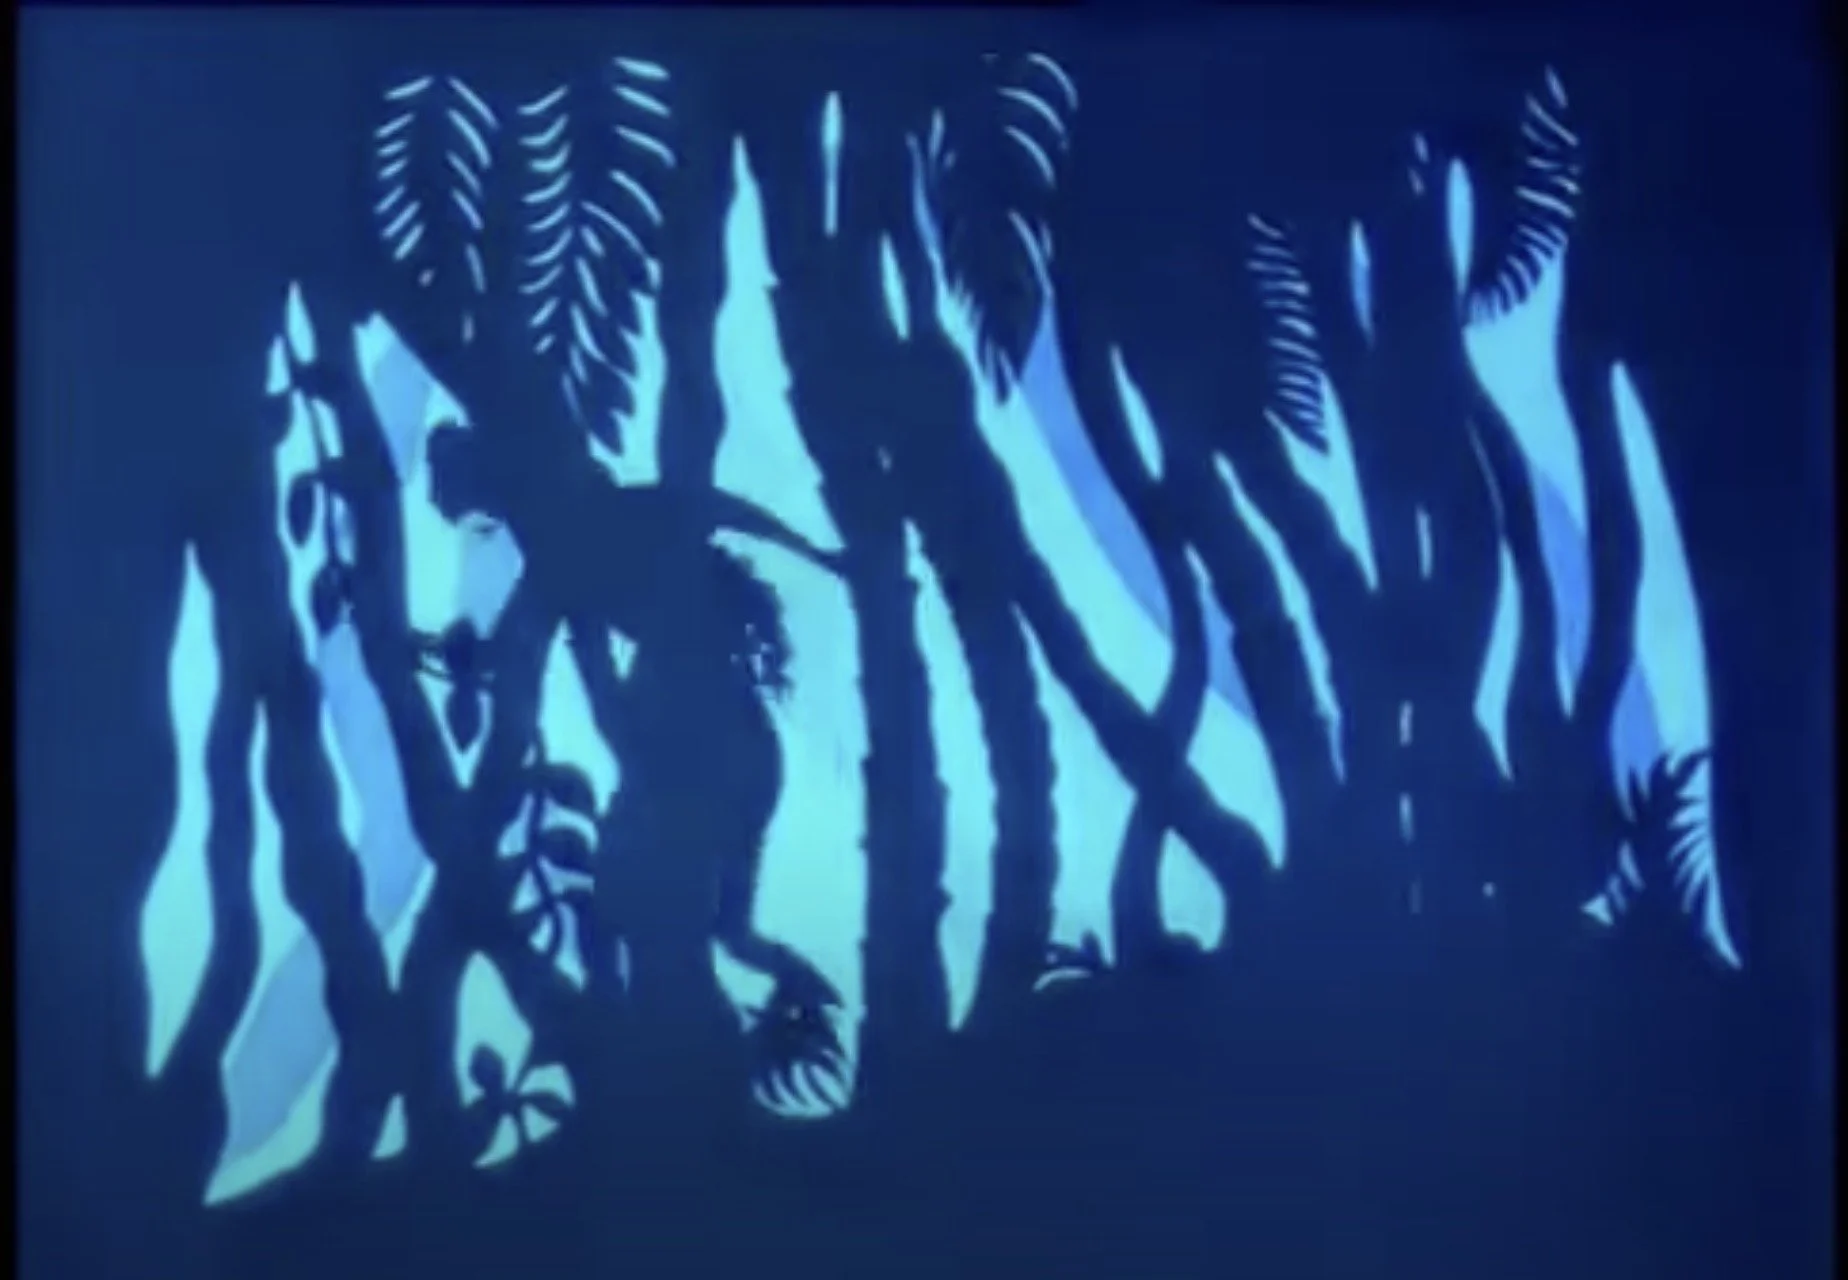
The first known use of a Multiple Plane setup comes from German artist and filmmaker, Lotte Reiniger. In 1926, Reiniger released her animated short film, The Adventures of Prince Achmed which used a paper cutouts reminiscent of an earlier style of shadow puppet theater. Layering the cutouts gave Reininger better control over the manipulate elements within the scene.


Walt Disney Animation Studios
Within a decade of The Adventures of Price Achmed's release, both Iwerks Studios and Walt Disney Animation Studios developed their own versions of the Multiplane Camera. Currently, Walt Disney's system stands out as the most recognizable and well-documented Multiplane setup.
Some of the most popular Disney films to utilize the Multiplane Camera were Snow White and the Seven Dwarves, Pinocchio, Bambi, and The Jungle Book. Released in 1989, The Little Mermaid marked the end of Disney's utilization of the technique as digital practices rendered it obsolete. However, these films helped to set new standards for animation, pushing the medium forward for many generations to come.
THE CONCEPT
Change OF PERSPECTIVE
It all starts with the idea. Being a huge fan of Miles Morales and the Spider-verse animated films, I was anxious to not only purchase these figures but also shoot them. As I mentioned above, pairing this technique with these characters was perfect.
Without spoiling anything related to the film (do yourself a favor and watch it if you haven’t), one of the main story plots includes the ability to travel across multiple dimensions - yep you guessed it… spider-verses. Traveling across these various universes is visualized using hexagonal gates or portals. My concept was to use 3 planes to support as many figures as I could highlight along with some handmade hexagonal portals. My original post-it note drawings below show the basic setup and framing I planned to achieve.

Posing and Test Shots
After having a solid concept and shopping list, I grabbed the supplies and figures and got started. As I have emphasized before in other tutorials, I spend a lot of time getting the character poses as dynamic as possible. Though it seems like a small detail that shouldn’t make or break the photo, you would be surprised! Below are a few of my initial poses that I mostly used for the final shot.


Other than the action figures the most important thing I was missing were the materials for the multiplane setup to work. I went to my local hardware store and purchased two sheets of acrylic each .09” in thickness. To save money, I ended up purchasing two different sizes. The largest sheet, which I placed further from the camera measures 30”x36” while the smaller sheet placed closest to the camera measures 18”x24”. For the plane furthest away from the camera it wasn’t necessary for it to be completely transparent, however I also bought a clear 24”x48” clear plastic acrylic prismatic ceiling light panel for additional texture. Lastly, a giant sheet of bubble wrap was also used to help break up the background.
With all of the elements in hand, I set everything up to ensure my approach would work and also get an idea of how to frame the shot. Personally, I find that doing tests throughout the entire process helps be efficient and recognize potential issues that may arise. Being detail-oriented, I find this aspect enjoyable and very rewarding once all is said and done.


HIGH INTENSITY RETRO REFLECTIVE TAPE (HXREF)
If you know anything about my personality and how I approach my own creative work, I always like to push myself to learn new things and try to challenge myself when I can. For the hexagonal portals, I could have either made them with colored paper or digitally drawn them in Photoshop during the editing process.
As I was working towards the best solution, I saw a video by the Corridor Crew titled Does the Lightsaber in 1975 Deserve a Second Chance that inspired me. In studying the practical effects originally used for the lightsabers in Star Wars: A New Hope, they found that high intensity retro reflective tape was used to achieve the in-camera glow for the saber. When lit, this material will only reflect back to the original light source position, which makes it incredibly unique when compared to other reflective surfaces. If you’re still unclear of how it works, think of a road sign at night lit by your car headlights.
This HXREF tape is fairly inexpensive and comes in several colors and widths. Based on the reference I pulled from screenshots of the movie, I really only needed orange and red, but it didn’t hurt to buy a variety pack. In the end, I used white, yellow, orange, and red to add a greater depth and variety to the gates. As an added bonus, the nature of this tape has a hexagon pattern which further adds to the digital look of the portals!


SETTING THE SCENE
ANATOMY OF A SHOT
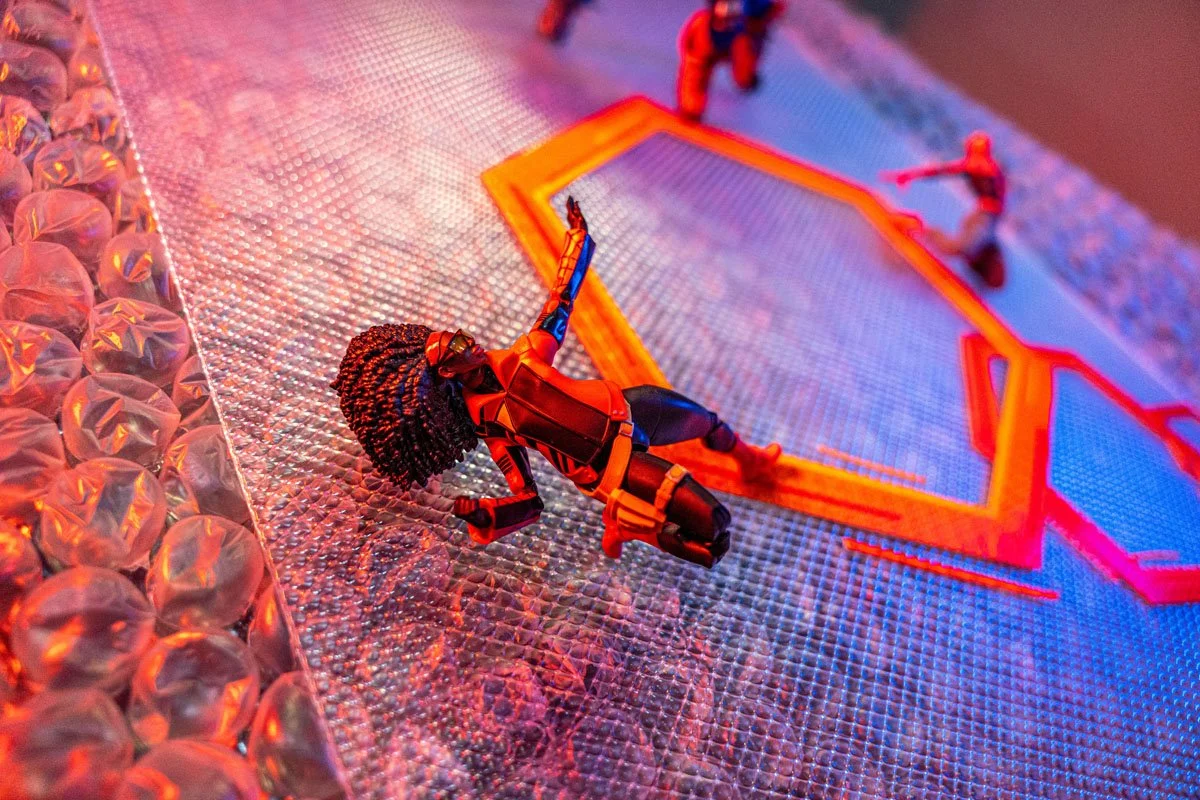
The next part of the process was to continue dialing the setup by adding the newly created hexagonal portals and make some final tweaks to the lighting and posing. One of the most exciting surprises was seeing the effect of the retro reflective tape work as I had envisioned! To get the best results, I ended up attaching a small Litra Torch on an articulating arm with a gooseneck and positioned it as close to the camera lens as possible. Due to the nature of how the tape works, the closer the light is to the lens, the more intense the illumination.
As you can see in the images, I used acrylic cylinders to prop up both Spiderman 2099 and Spider Gwen. Using clear supports allows the scene lights to mostly pass through without creating any unwanted shadows. For additional support, I like to use sticky tack to secure the figure which can easily be obscured so it isn’t seen by the camera.


LIGHTING
Knowing that the primary key light would be coming from the small Litra Torch next to the lens, the remaining light would help fill the scene and accent the figures. To keep these supporting lights from reflecting back into the camera, I was intentional in placing them off to the sides. I used 2 GVM LED panels with a blue and red colored gel to provide the primary fill for the shot. For adding rim light around the top and bottom of figures, I used 2 Aputure RGB LED minis. If I didn’t use the HXREF tape, this scene would have required much more light.


TEST SHOT RESULTS
Here are the series of test shots that I took throughout the process. The first shot was taken to give me an initial look at composition and where I needed to place the portals. With the figures shot, I then used photoshop to draw in the portals prior to crafting them by hand. The next shot incorporates the cutout paper hexagons along with a dark background test. Finally the third shot is mostly complete, but you can see the background textures that I was testing out. Ultimately I layered the ceiling light panel on the bubble wrap that was placed on the black crumpled paper. I loved how the texture ended up in the final!


Photoshop Previsualization

FRAMING WITH PAPER HEXAGONS

BACKGROUND MATERIAL TEST


MULTIPLE PLANE in action
THE FINAL RESULT
Implementing this technique was a lot of fun and seeing the results in real time was a blast. Like many of the practical techniques I have explored, this one was incredibly simple but extremely effective. I have several other ideas that would be ideal for this approach and can’t wait to try it again in the future.
Have you tried this technique in any of your work? If so, tag me in your posts on instagram use the hashtag #wmol_multipleplane in your caption. I would love to see your shots featuring this awesome technique so be sure to reach out to let me. Check out my other posts where I explore more practical effects and share a behind the scenes look at my process.
Thanks for learning with me and hopefully this inspires you to get creative with your next project.

THE PRINT
As part of my series that explores techniques of visual effects, my exploration with the Multiple Plane setup resulted in this concept called “Spider-verse Traverse”
“Spider-verse Traverse” is an archival-grade print on Fuji Crystal luster photo paper and mounted on black styrene board for long-lasting durability. Please allow up to 2 weeks before your order arrives. Shipping included!
Currently available for US and Canada orders only. Please email info@invisibleelement.com if you would like a custom quote for shipping or have additional inquiries.


As part of my series that explores techniques of visual effects, my exploration with the Multiple Plane technique resulted in this concept called “Spider-verse Traverse”.
“Spider-verse Traverse” is an archival-grade print on Fuji Crystal luster photo paper and mounted on black styrene board for long-lasting durability. Please allow up to 2 weeks before your order arrives. Shipping included!
Currently available for US and Canada orders only. Please email info@invisibleelement.com if you would like a custom quote for shipping or have additional inquiries.